Configure Azure CDN for static websites
Azure CDN is a great service to add functionality to your website. In this post we will setup a Azure CDN resource, add a custom domain, activate free SSL and take a look at the CDN rules engine.
This is a multi part article with the following parts:
- Part 1 - Static site generators
- Part 2 - Setup Azure Storage Account for static websites
- Part 3 - Setup Azure DNS for static websites
- Part 4 - Configure Azure CDN for static websites
- Part 5 - Configure Azure Function App for root domain redirection
- Part 6 - Setup Azure DevOps CI/CD pipeline for static websites
In this part we will setup a Azure CDN service with Verizon tier, connect it to our storage account and add SSL support. Lastly we will take a look at the Verizon rules engine.
Azure CDN
The next step is to setup and configure the CDN. To have the benefits of the Verizon rules engine, we choose the CDN tier “Verizon Premium”.
After the CDN is created, we have to add an CDN endpoint. One endpoint can serve as backend for multiple custom domains and will be used to serve the content from our storage account.
As we did not specify it, the endpoint will be reachable by HTTP and HTTPS over port 80 and 443.
We cannot choose storage as type for the endpoint, as then the blob not the web endpoint of the Azure storage account would be used.
We just select custom origin and use the http endpoint from part 2 (staticsitedemo.z6.web.core.windows.net).
Next we add our custom domain “www.staticwebsite.de". In part 3, we already created the necessary DNS records for this step, so we can directly use the following command to add the custom domain:
There is a workaround for adding custom root domains with SSL support to Azure CDN. This workaround does not work anymore. Microsoft/Verizon updated their backend, probably for security reasons, and an error will be thrown, when trying to activate SSL. The only currently supported way to add SSL certificates to an apex domain is to use the “Use my own certificate” (Bring your own certificate) feature with Azure Key vault.
Next we activate SSL to get a CDN provided free SSL certificate that renews automatically(!)
The certificate request was successfully submitted, but it can take up to 12 hours until the whole automatic verification process is completed. Your SSL certificate will the automatically be applied to your CDN endpoint.
Verizon CDN configuration
Next we will do some configuration in the Verizon portal. To go there, you have to open the CDN endpoint resource in the Azure portal, click on “Advanced Features” in the left pane and click on “Manage”.
We will implement the following features in the Verizon portal:
- HTTP to HTTPS redirection (Rules Engine)
- Caching (Rules Engine)
- HSTS header (Rules Engine)
- Enable GZIP compression in CDN
The rules engine can be found under “HTTP Large -> Rules Engine”.
Rules changes can take up to 10 minutes to propagate through Azure CDN.
HTTP to HTTPs redirection
To redirect traffic flowing over the CDN to the secure HTTPS endpoint, we have to add the HTTP to HTTPS rule.
1 | <rule id="1111111" platform="http-large" status="active" version="0" custid="XXXXX"> |
We basically create a regular expression that matches in every request, coming through the CDN via HTTP and redirect it to https://www.staticwebsite.de, attaching everything after the forward slash from the origin to the redirected url.
 HTTPS rule
Caching
Next we configure the caching on the CDN endpoint. Therefore we have to understand the difference between Internal Max-Age and External Max-Age settings. The Internal Max-Age setting determines the time, the endpoint waits to revalidate (reload) the cache data from origin. External Max-Age determines, how long the browser waits till it revalidates (reloads) the cache data from the CDN endpoint.
We set the Force Internal Max-Age setting to 86400 seconds (one day) and the External Max-Age setting to 604800 seconds (7 days).
These values differs from website to website depending on how frequently content is added, updated and deleted. A good reference to find out the values that works best for you is the Google HTTP Caching reference.
1 | <rule id="1111111" platform="http-large" status="active" version="0" custid="XXXXX"> |
HSTS header
One of the requirements for our website to be listed on the HTTP strict transport security (HSTS) preload list is to serve a valid Strict-Transport-Security header. We can do this by configuring the following rule in the rules engine.
1 | <rule id="1111111" platform="http-large" status="pending" version="0" custid="XXXXX"> |
Compression
Finally we configure compression for all content types on our CDN endpoint. Therefore we navigate to “HTTP Large -> Cache Settings -> Compression”. We just copy the list of all supported content types, replace the line breaks with commas and paste that into the “File Types:” field and set the checkbox to “Compression Enabled”.
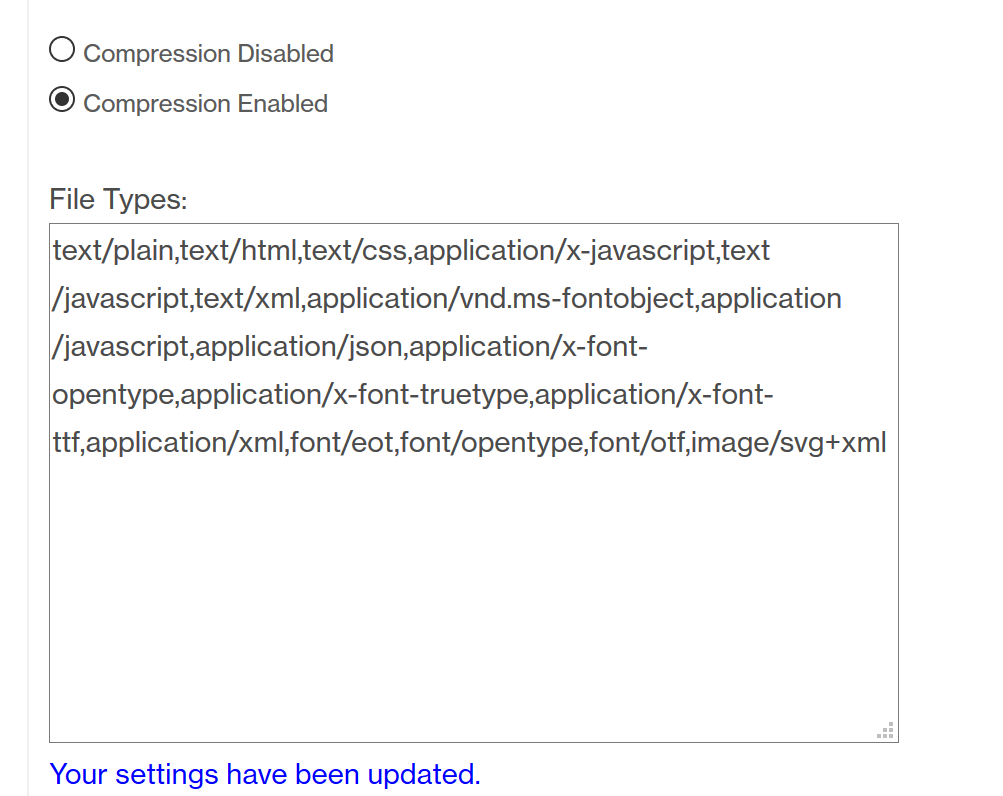 CDN compression
We have configured our Azure CDN endpoint with a few basic rules and enabled gzip based compression for our website.
See the next part to learn, how to forward all traffic from your root domain to the www subdomain for HTTP and HTTPS using an Azure Function.