Migrate Azure Pipelines to GitHub Actions - Part Three
This is the third part of the blog series on how to move from Azure Pipelines to GitHub Actions.
This is a multi part article - find the other parts at the links below:
- Part 1 - Intro/Source Code Migration/Scopes/…
- Part 2 - Trigger/Concurrency/Agents-Runner/…
- Part 3 - Variables/Secrets/Artifacts/…
- Part 4 - Templates/Conclusion/Examples/…
Table of Contents
Deployments / Environments
Deployments in Azure Pipelines and GitHub Actions are treated a little differently than “regular” CI pipelines, because they can reference Environments. The concept of environments is available in both tools and they cover a lot of the same things but are also a little different. I will focus on the approval part for the environments.
Azure Pipelines
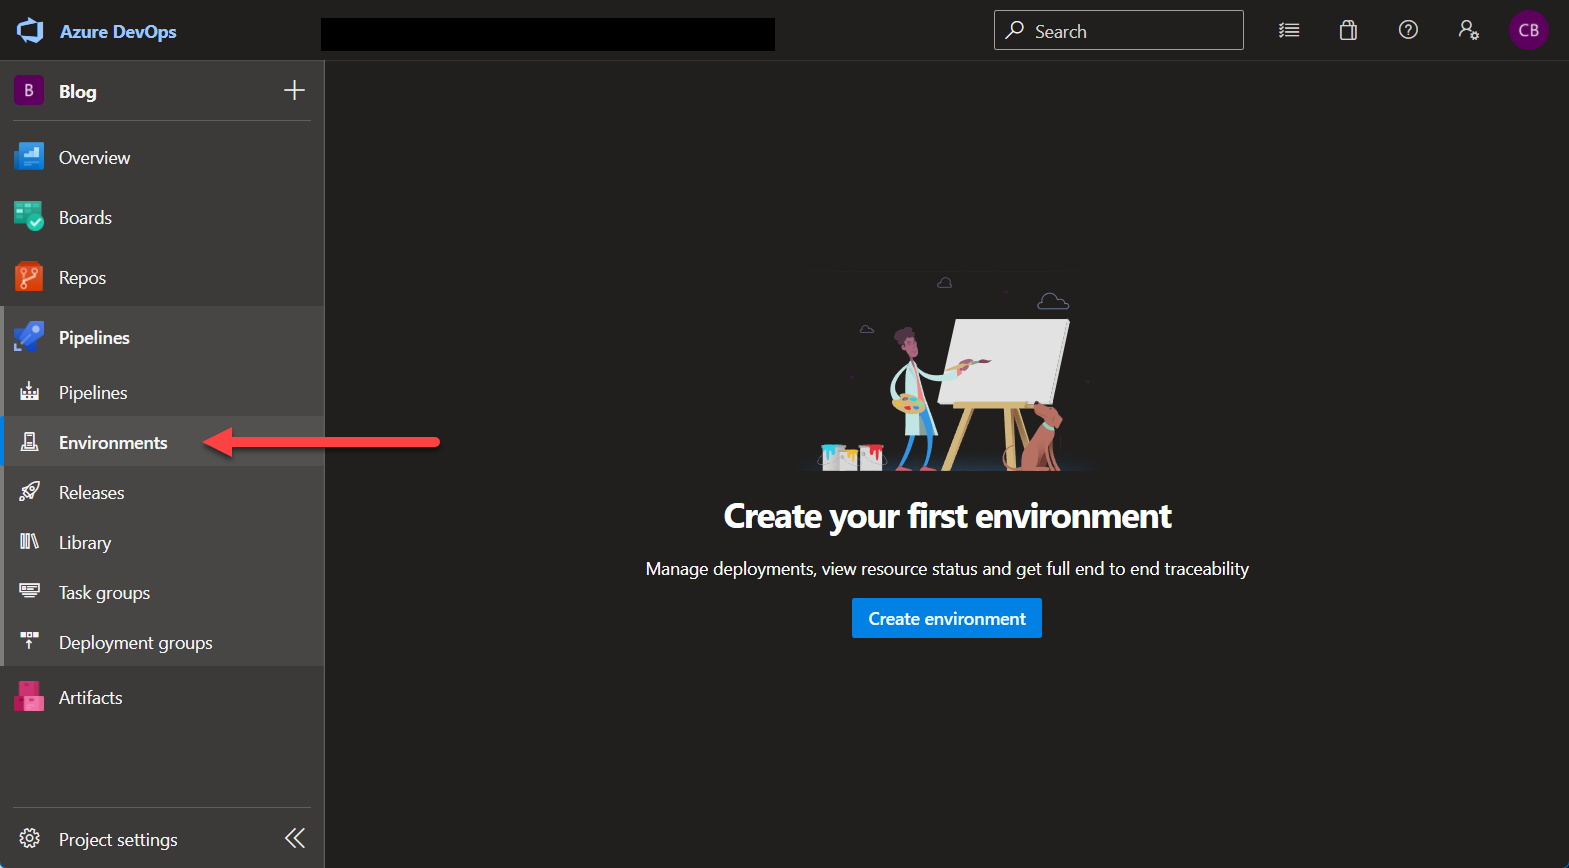 Azure Pipelines Environments
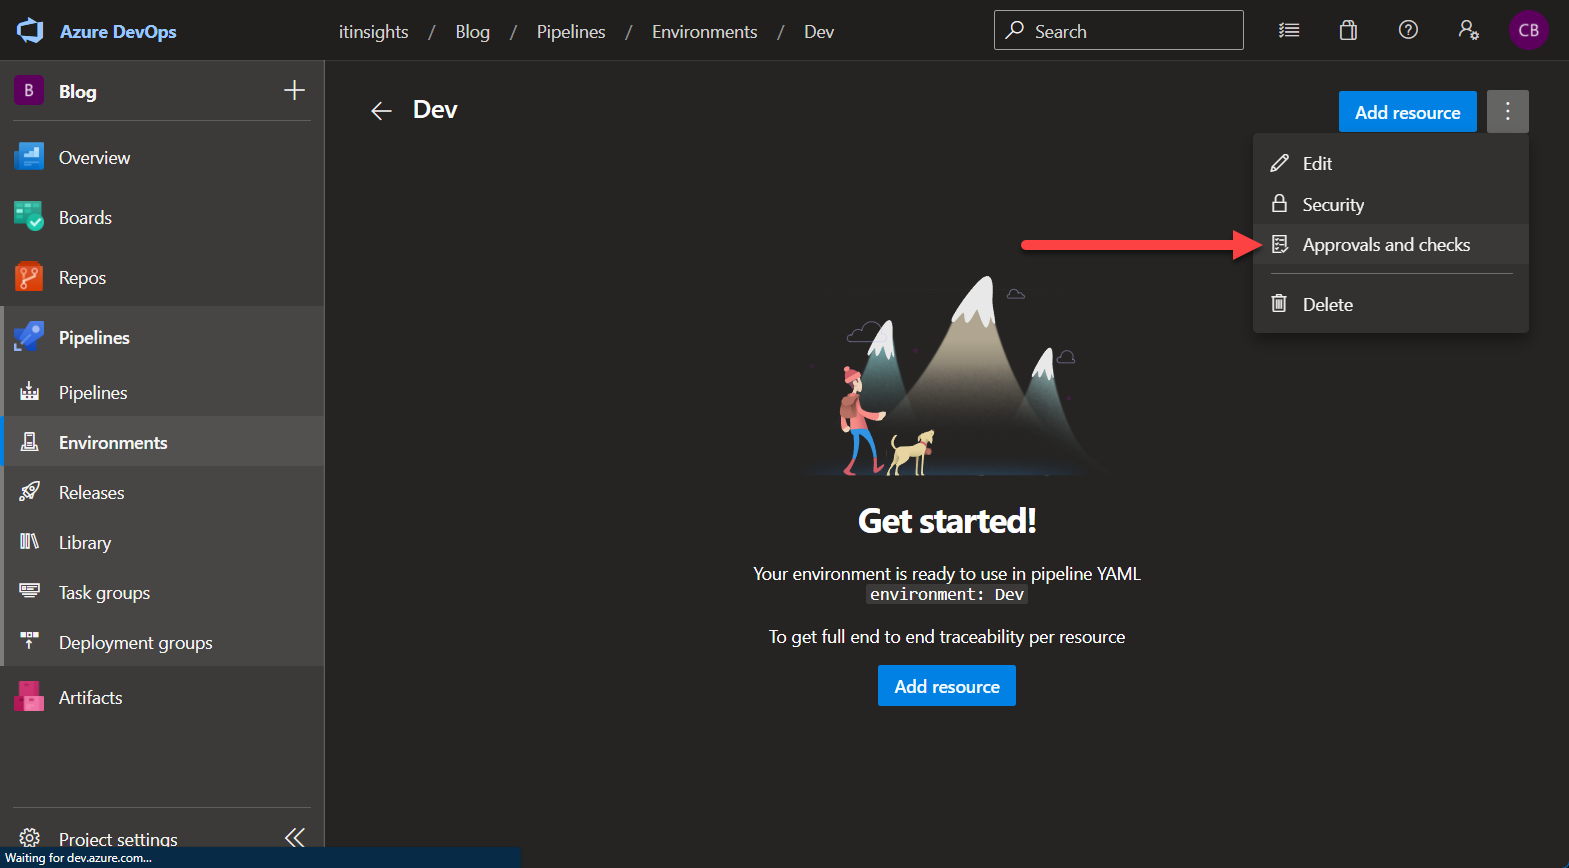 Azure Pipelines Environments
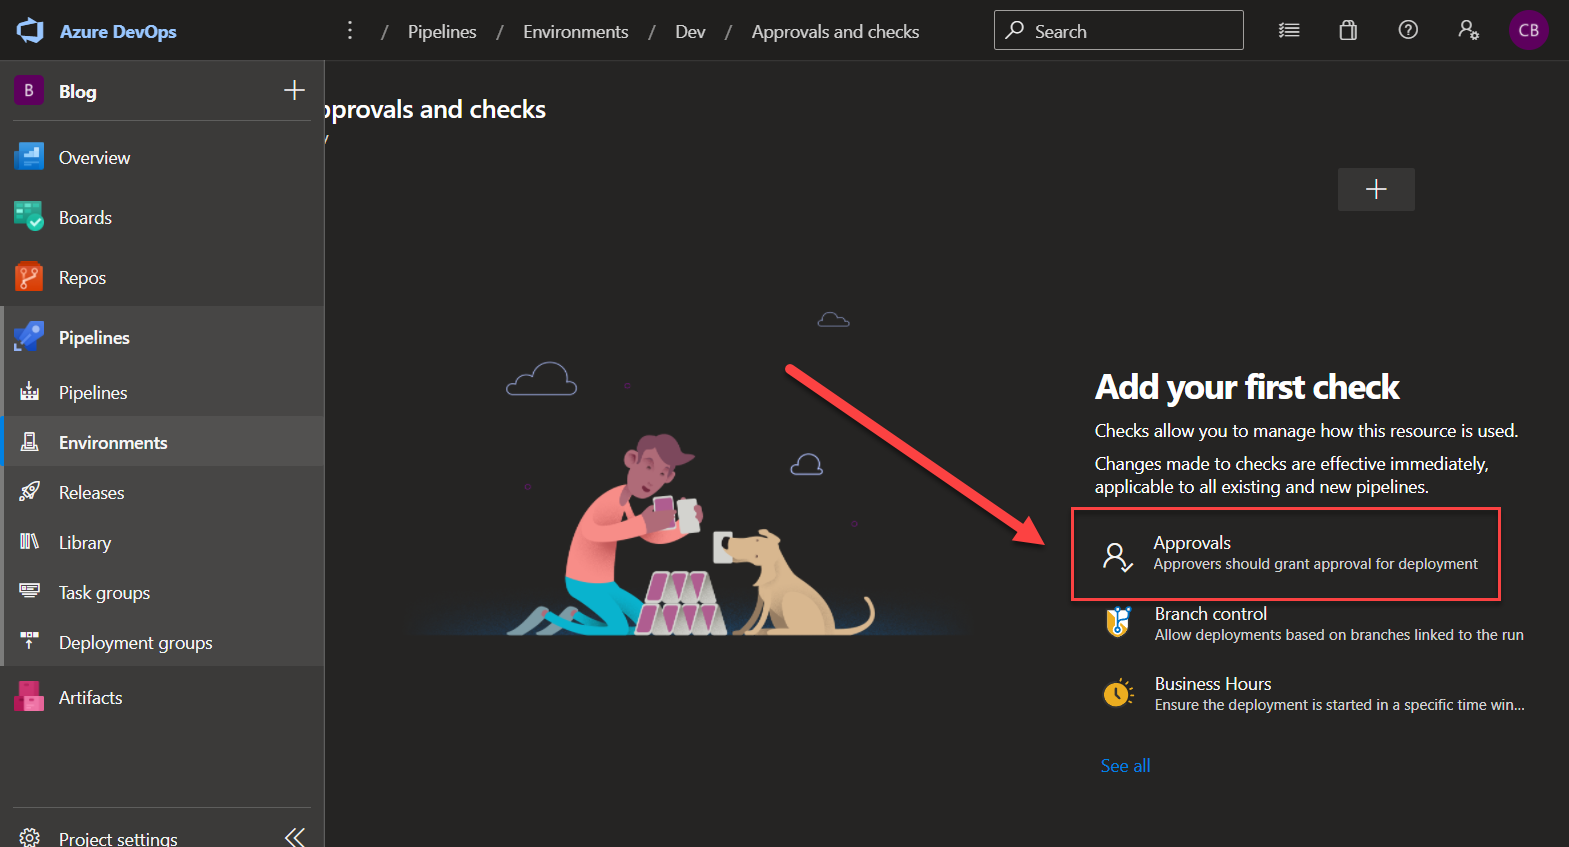 Azure Pipelines Environments
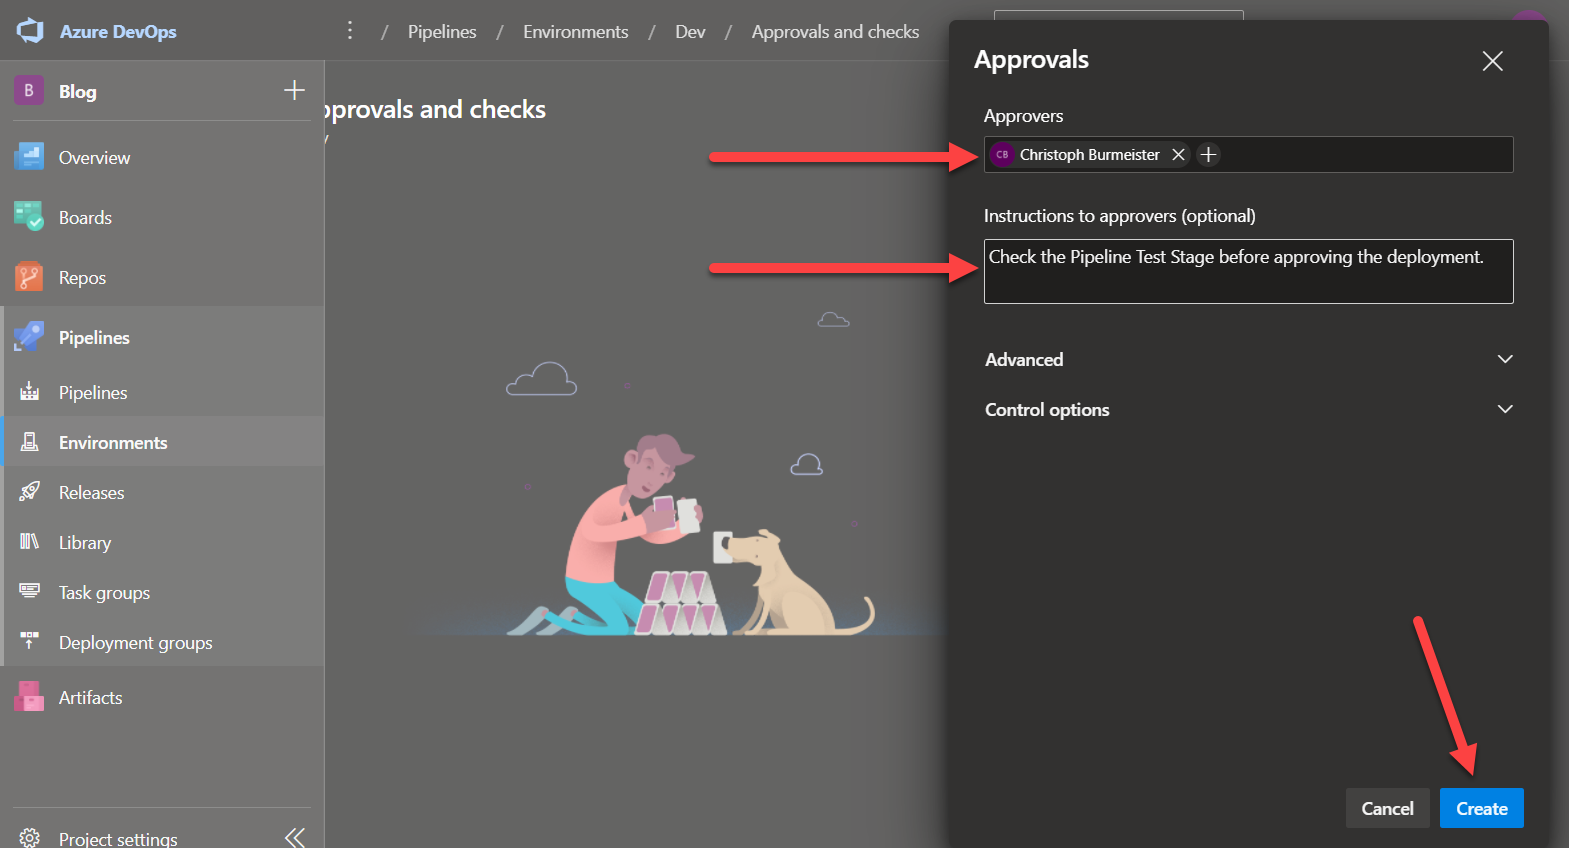 Azure Pipelines Environments
To reference the environment, use the following snippet:
1 | ... |
The entire deployment schema can be found here.
Deployments do cover much more than just environments in Azure Pipelines. You can configure canary deployments, different hooks to react to failed deployments, run pre-deployment tasks and so forth.
GitHub Actions
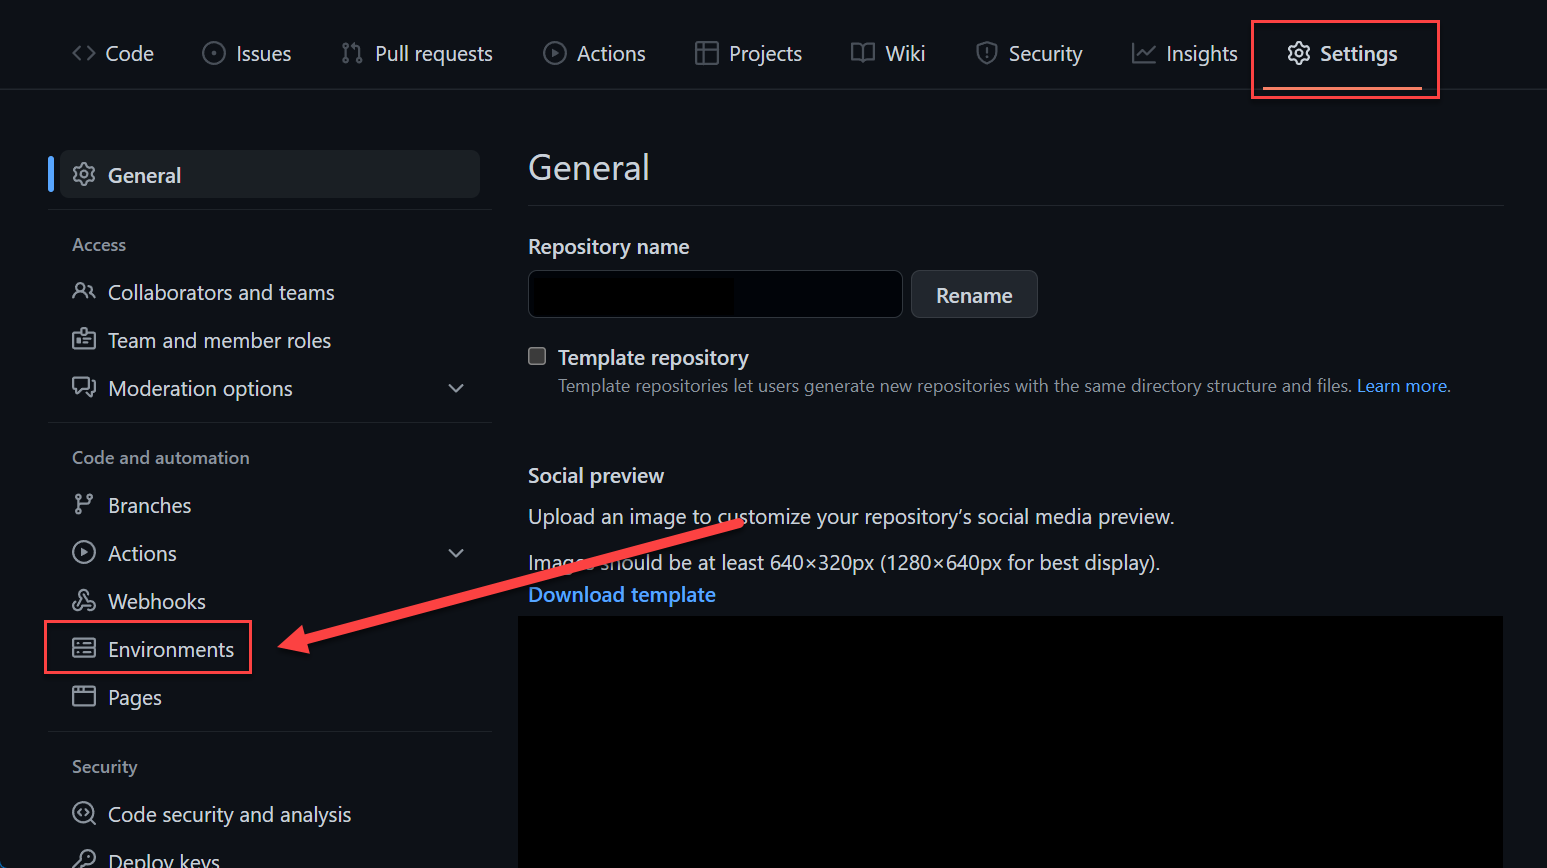
Environments are create at repository level, in organization repositories to be precise.
 GitHub Actions Environment
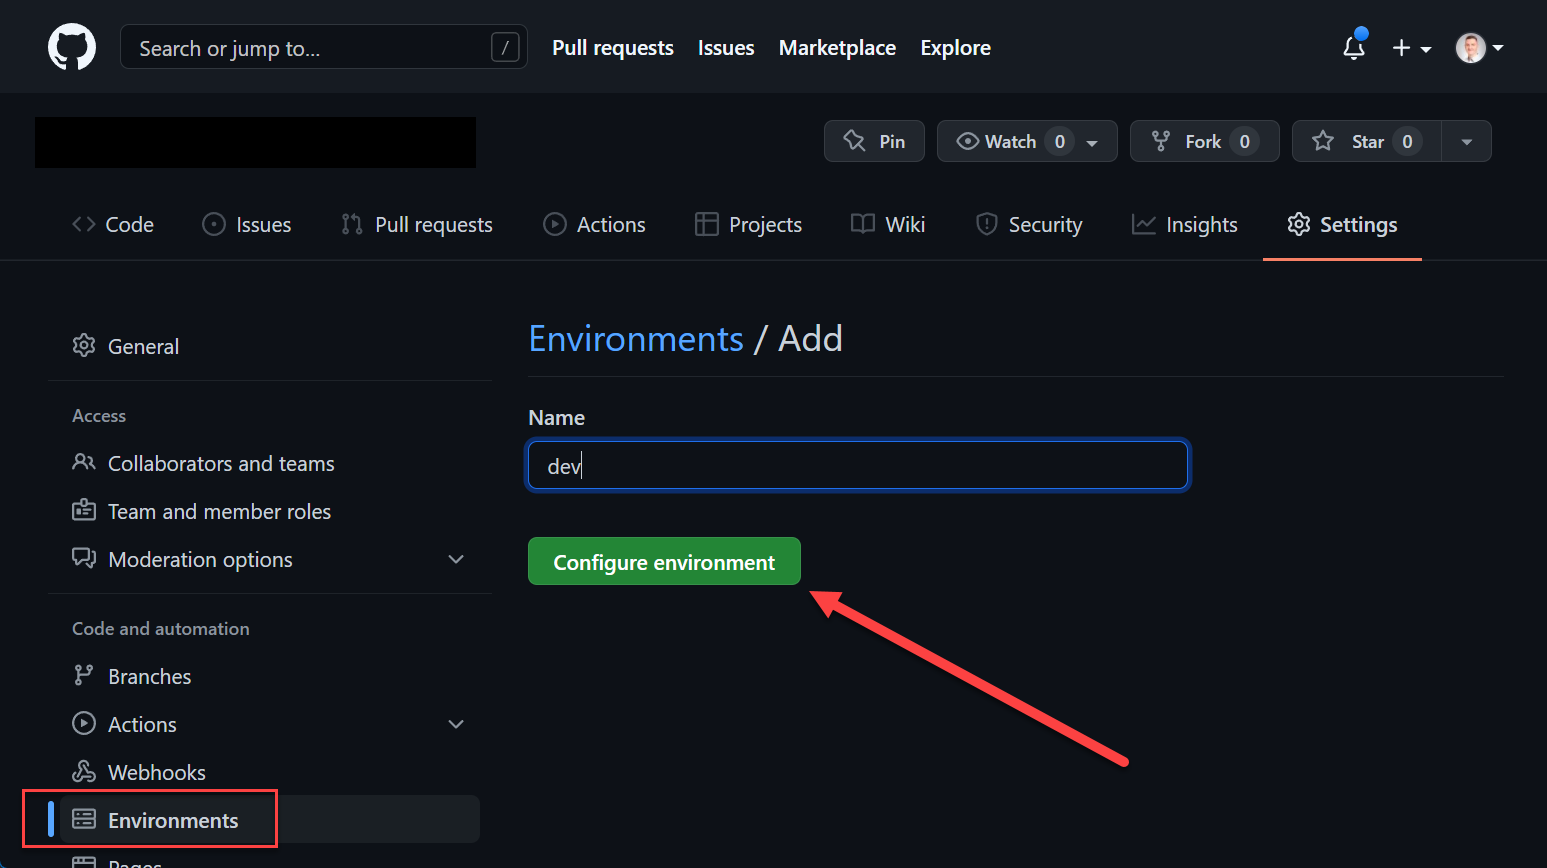 GitHub Actions Environment
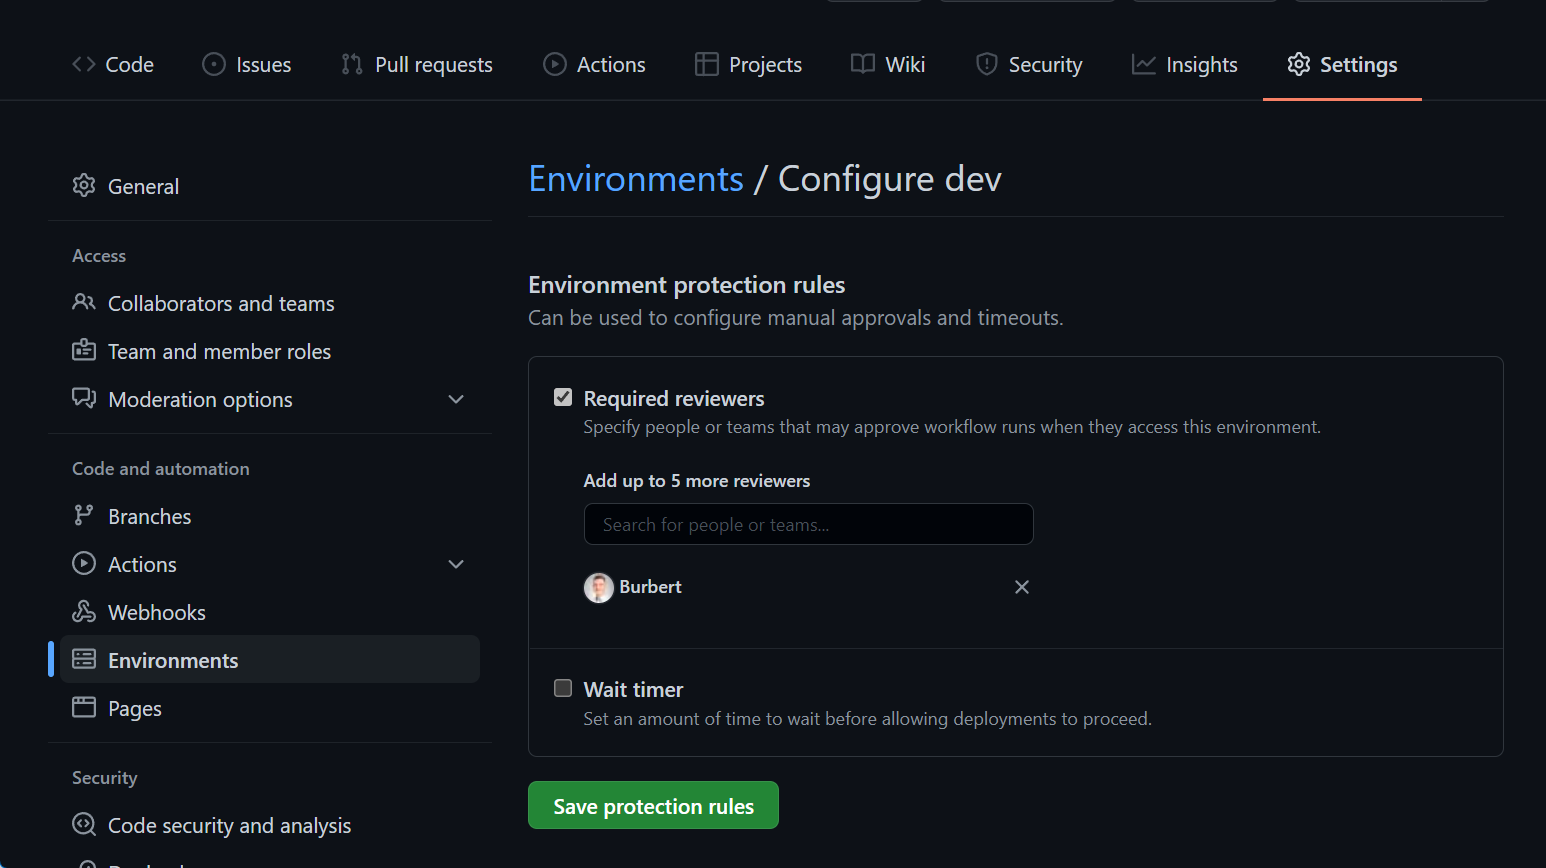 GitHub Actions Environment
Environments allow the configuration of two parts, protection policies and secrets. Secrets are mentioned in more detail in the Secrets / Credentials section of this post. Protection policies allow the configuration of up to six approvers (user/teams) and to set a wait timer.
1 | ... |
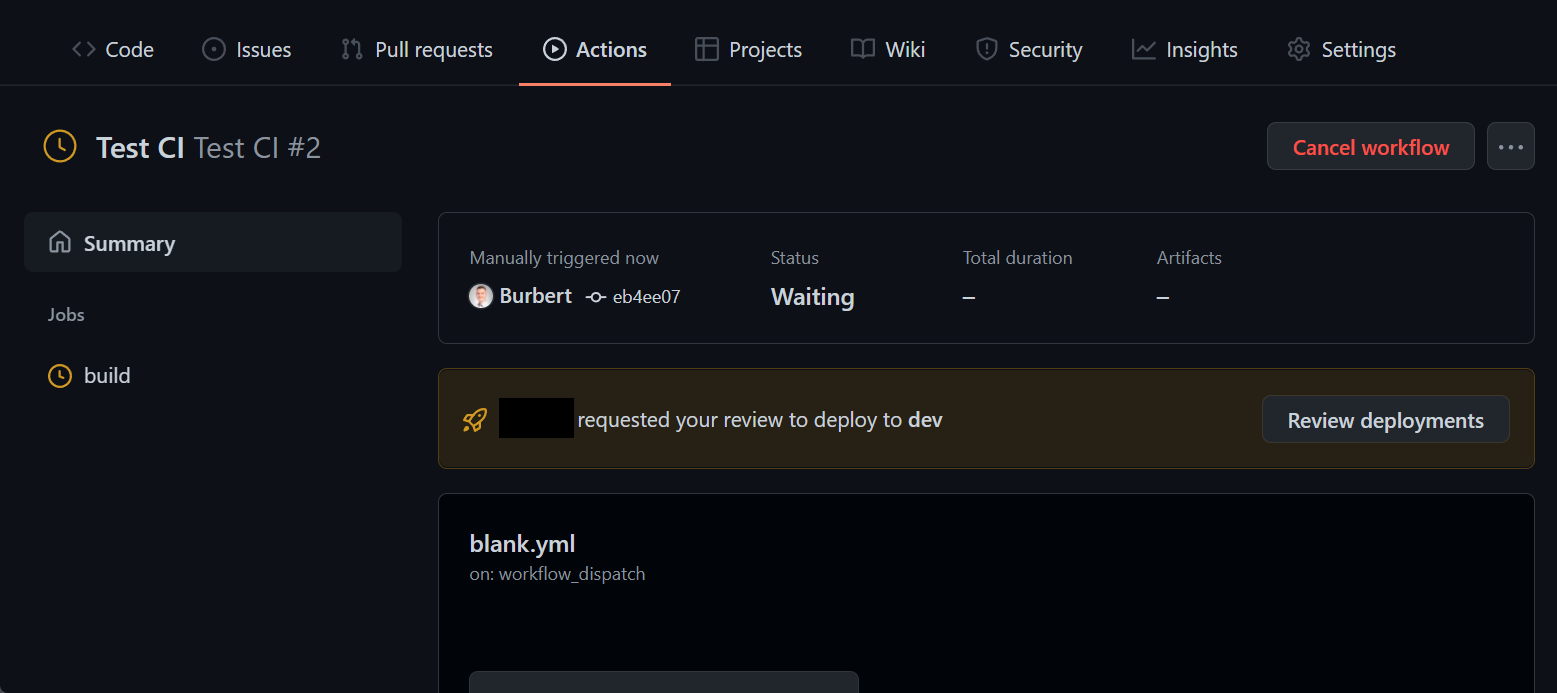
During a run, it looks like this:
 GitHub Actions Environment Approval
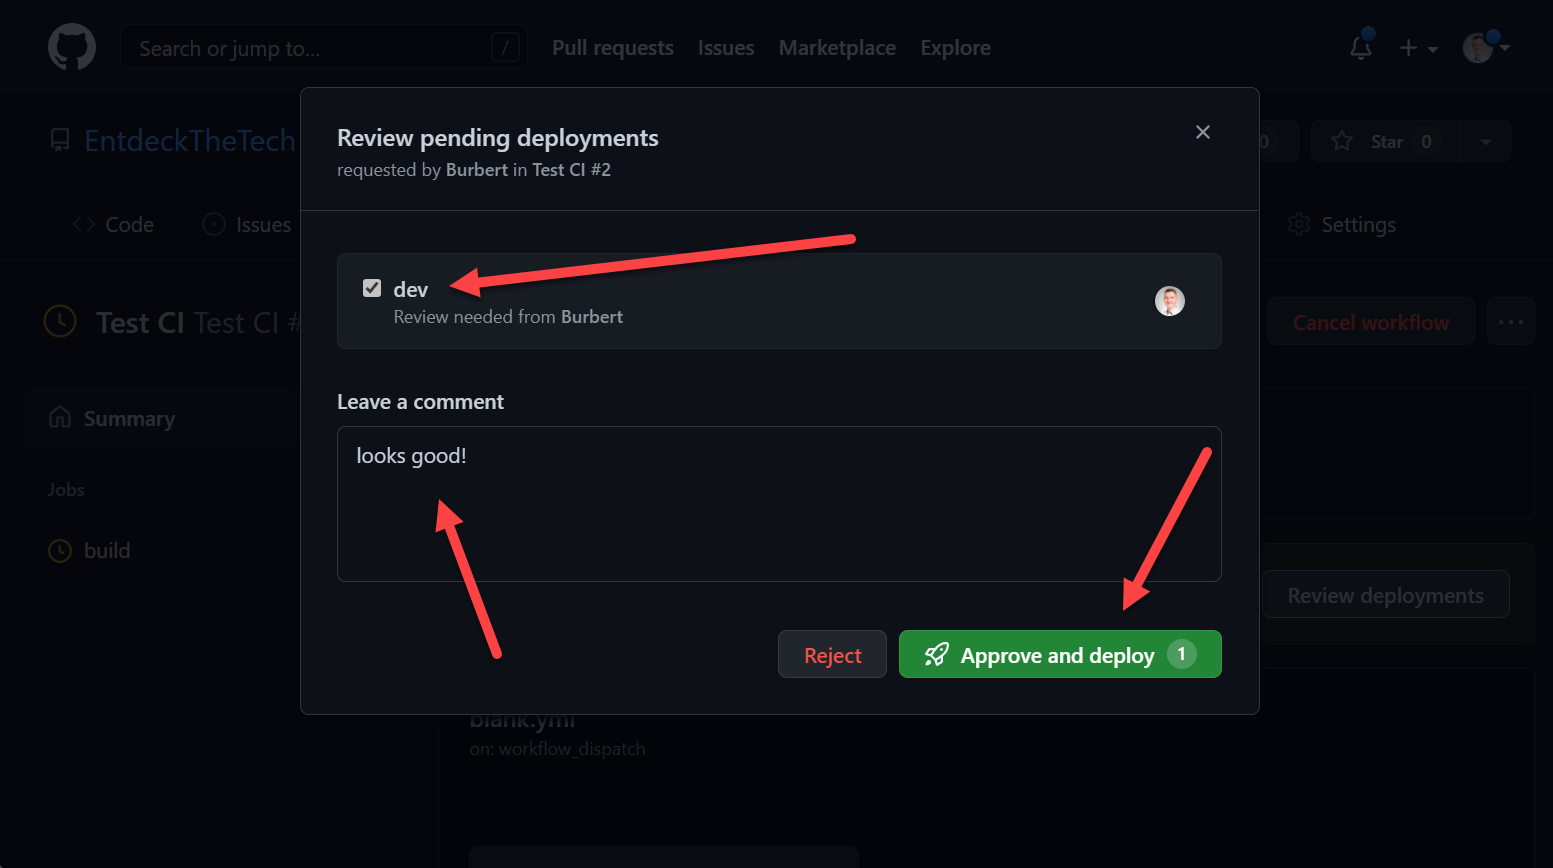 GitHub Actions Environment Approval
You can read more about the use of environments here.
Variables
Well, variables in CI/CD environments are bit of a rabbit hole because there is a lot built in and you can also set them yourself or create them with a step. There are environment variables, system variables and user defined variables. I cannot go over all of them but I will go into more detail about how you can set and consume them and in what way.
Azure Pipelines
When you take a look at the docs you can find all of them.
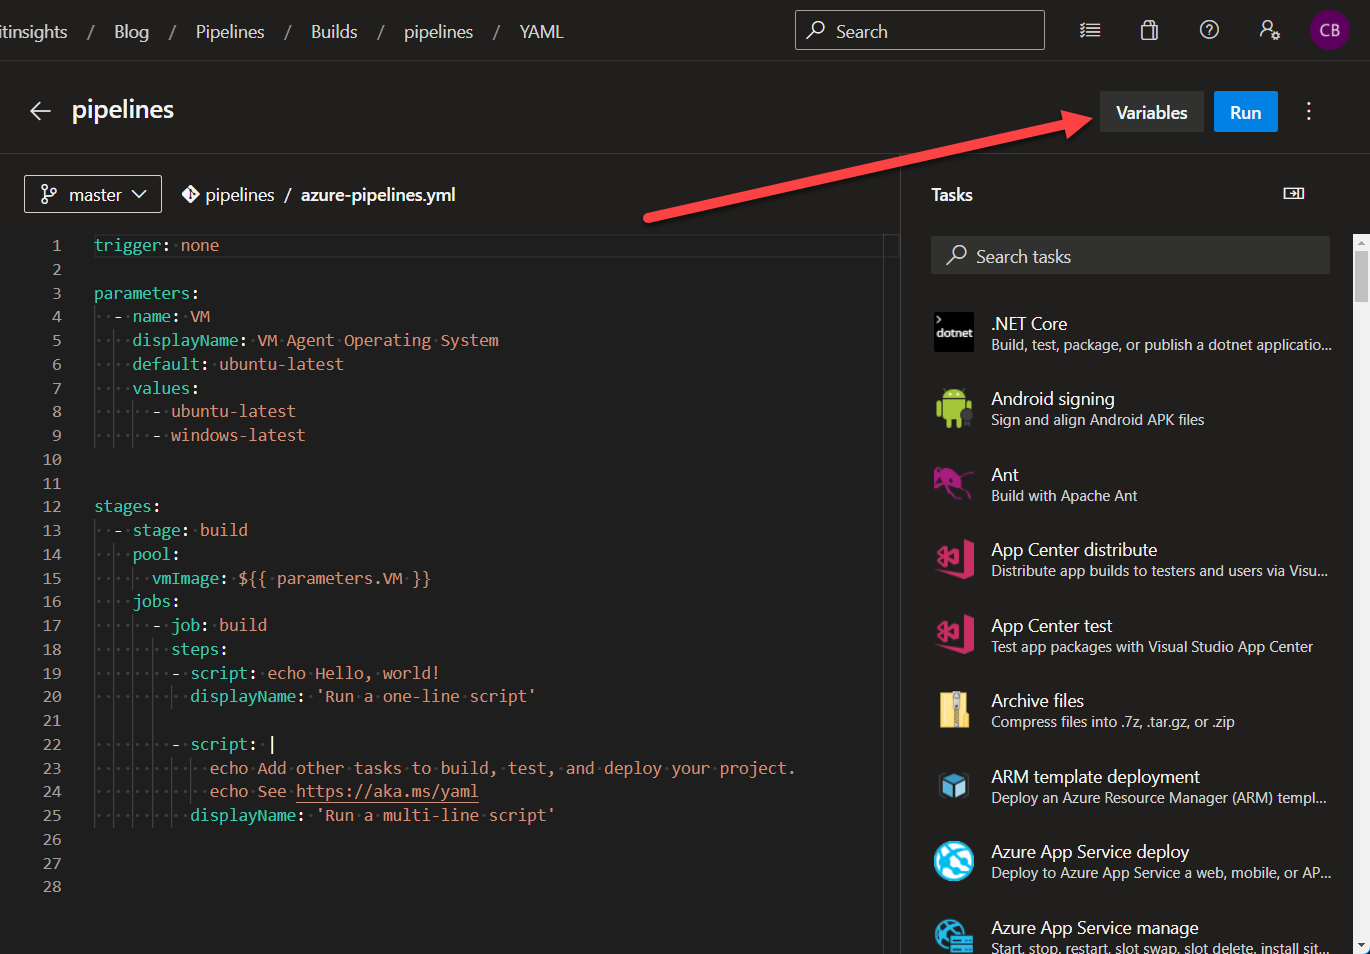
As shown in the Secrets / Credentials section of this post, you can define variables for each pipeline in the portal. I would recommend using this only, if you have to because it can be hard to debug since it is not part of the pipeline definition.
 Azure Pipelines Variables
This is a good option for testing, however, in production, I would not recommend it.
The better way is, to set the variables as part of the pipeline definition:
1 | ... |
or:
1 | ... |
You can even use conditions to set variables. For instance, based on the branch:
1 | ... |
This can be very convenient. The value variables[‘Build.SourceBranchName’] is a reference to a build variable.
Now, you can pass the variable to a step:
1 | ... |
Keep in mind, variables are referenced with the following syntax: $(<variable name>)
You can create environment variables within scripts and use them in later steps:
1 | ... |
Here, you also reference them with the following syntax: $(<variable name>)
Artifacts
Artifacts can be used to publish software packages (NuGet, NPM, Maven, …) or pass build artifact files (e.g. .exe, .jar, … files) to other jobs in the pipeline - You can build a .jar-file in the build step of your pipeline and consume it during the build of a docker container.
I will focus on the part of passing artifacts to other jobs of the build pipeline.
Azure Pipelines
Azure Pipelines has a step for creating (publishing) an artifact and one for consuming it.
The example below is from the Microsoft Docs and creates a .txt file and publishes the artifact called drop.
1 | ... |
The example below shows the consumption of the **drop** artifact. The name drop is the default value, it can be called as whatever you want.
1 | ... |
Find the full example below:
1 | ... |
In some cases, it makes sense to create a zip-archive first and publishing only the zip file.
Find the full reference of Azure Pipeline Artifacts here.
GitHub Actions
GitHub has a very similar approach. For instance, you create .jar-file during the build and publish it as an artifact for the next job to consume it. It also gets a name. If you publish multiple artifacts during a build, you can download all at once when you remove the name parameter from the download step.
By default, artifacts are stored for 90 days, but I would recommend specifying the retention time to the lowest possible value that you require, since this increases the price of your organization and most of the time, a long retention is not necessary.
1 | ... |
You can find the GitHub docs about artifacts here.
Secrets / Credentials
Accessing and passing secrets is entirely different in both tools - well, sort of. Ok, it can be 😉 Let me explain.
Azure DevOps has several ways to store secrets at rest, within the tool itself, you store them per pipeline as (secret) variables, you can create libraries, in which you can create variable groups and secure files to store them grouped together. You can even link a variable group to an Azure KeyVault and allow the variable group to access the secrets there.
In GitHub Actions, it is a little easier - you can create secrets per repository, organization wide secrets and within environments - thats it. It is worth mentioning, organization wide secrets for private repositories require an enterprise license, which might take away that option entirely and leaves you only with secrets stored in your repositories.
Personally, I like the simple approach of GitHub here, but the KeyVault integration of Azure Pipelines is really nice too, so take this switch with a grain of salt.
Azure DevOps
Secrets as Variables
You can defince secrets as variables per pipeline and flag them as secret values:
Azure Pipelines Secrets as variable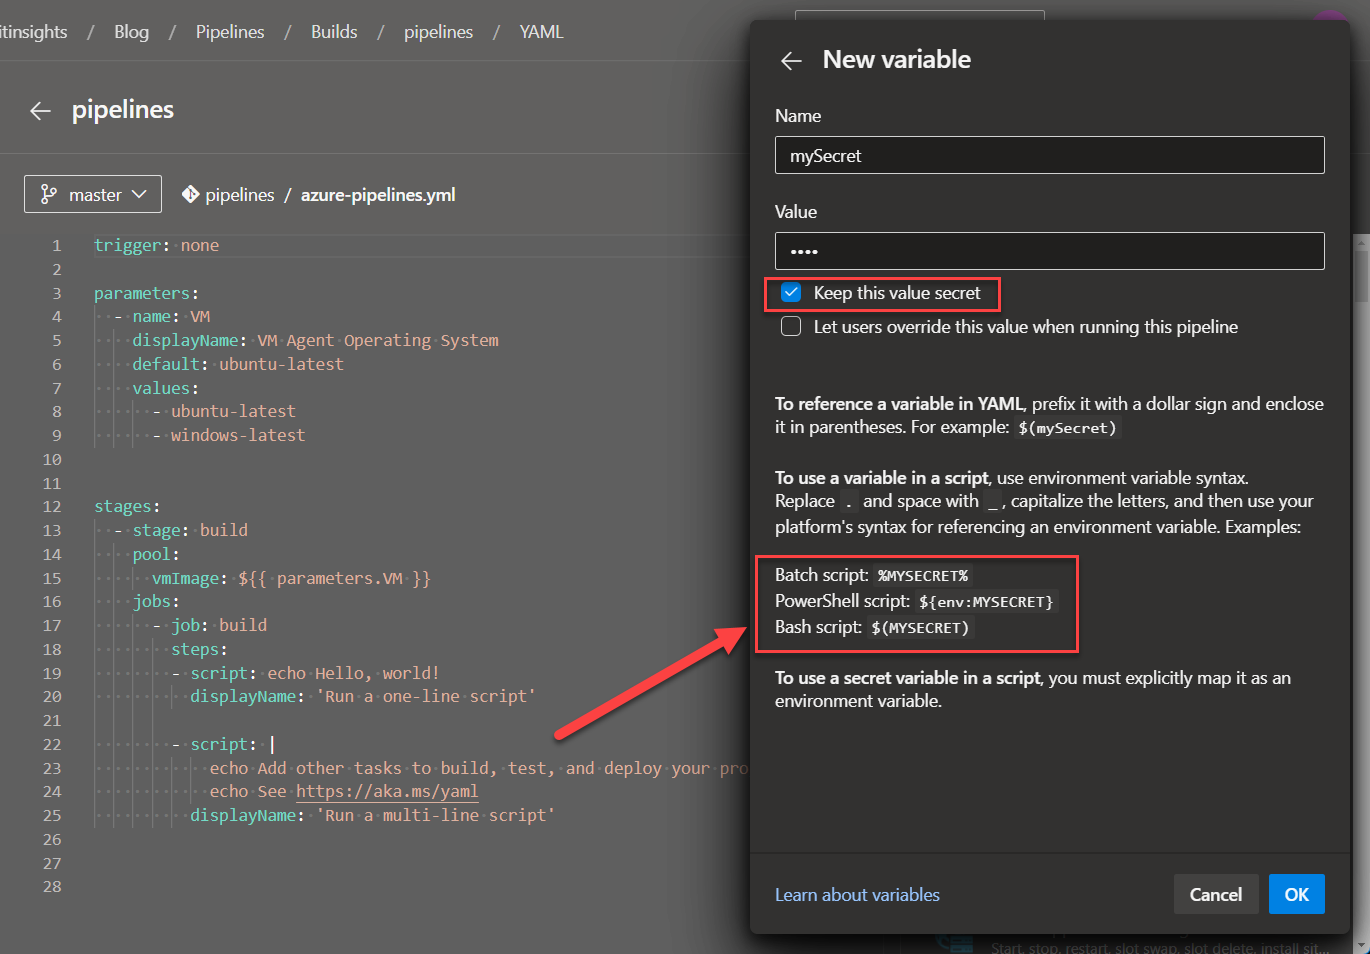 Azure Pipelines Secrets as variable
The screenshot above also shows, how you can reference them in the pipeline.
Libraries
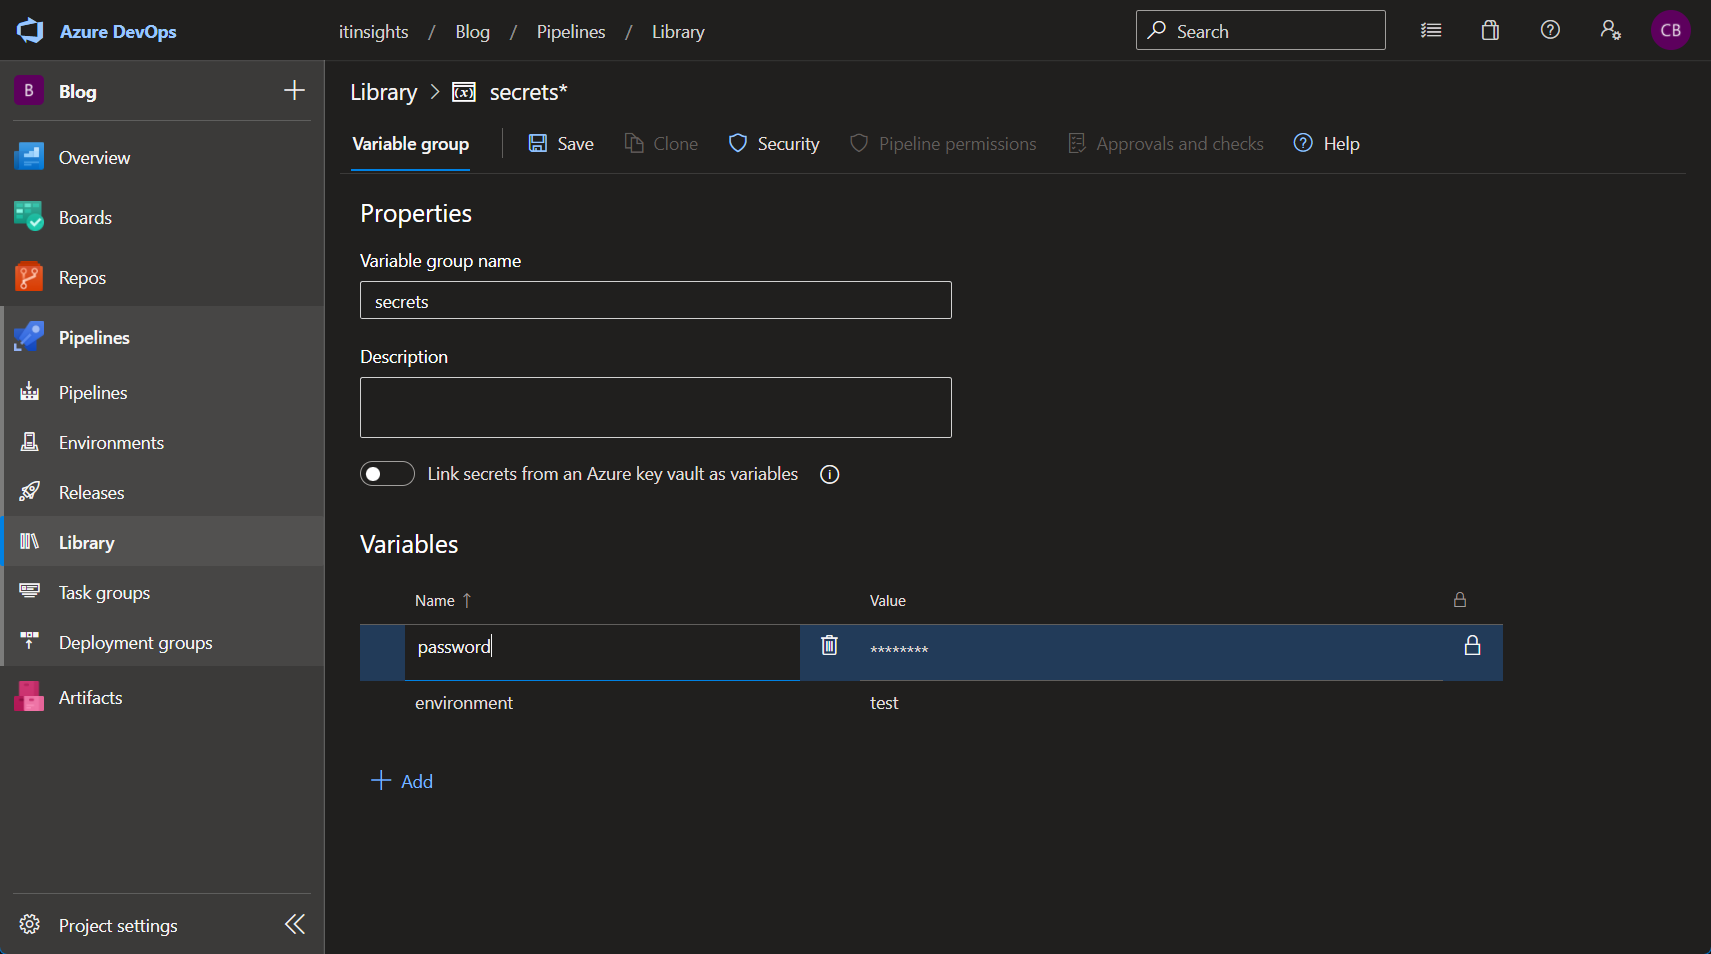
Libraries on the other hand have several ways to store and access secrets as well as regular variables. You can create a variable group that stores several entries, each entry can be marked as a secret and later in your pipeline, you can reference the entire variable group.
 Azure Pipelines Variable Group
1 | ... |
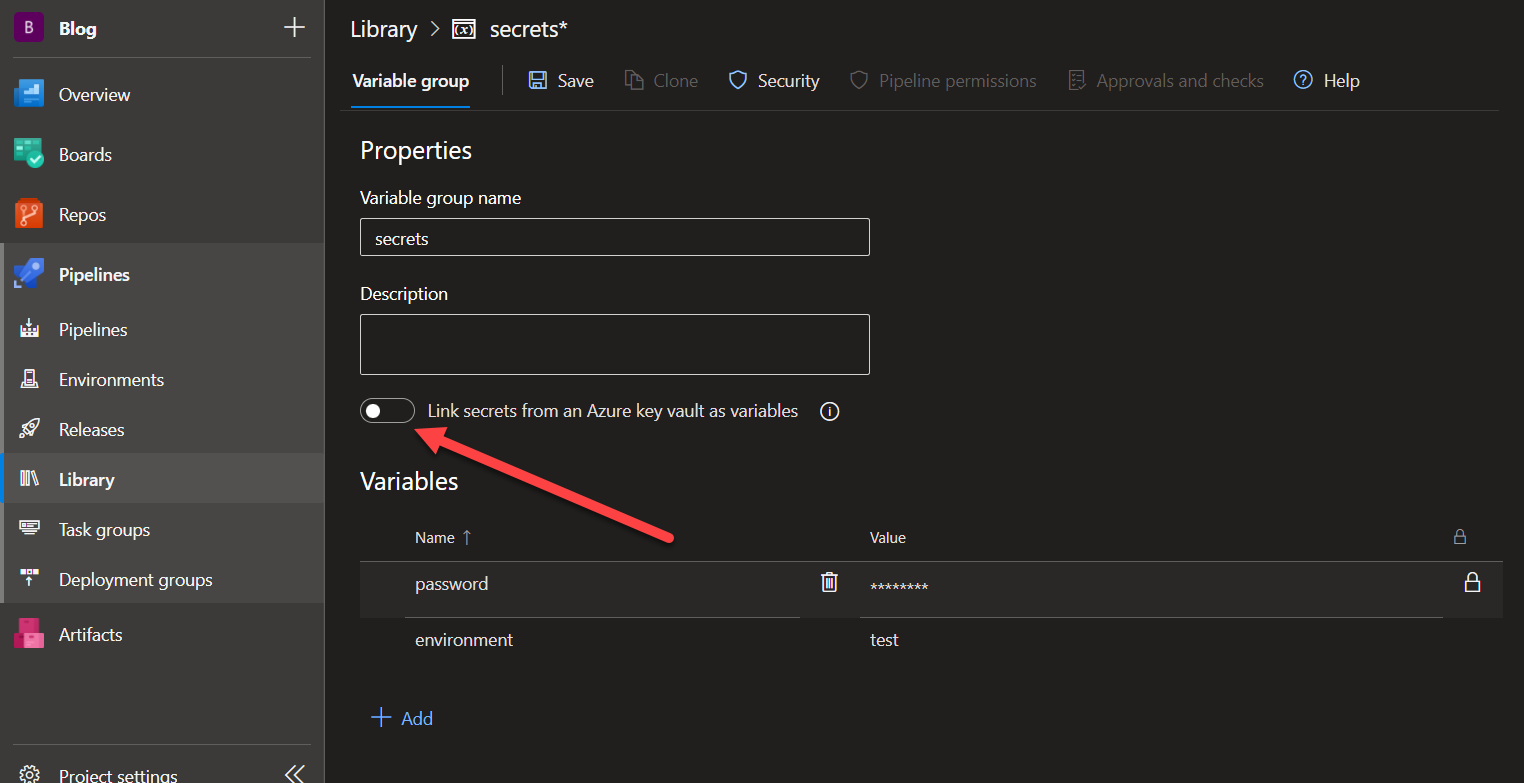 Azure Pipelines Variable Group - Key Vault
You can connect the variable group to an existing Azure Key Vault by using the toggle and selecting the Vault you want to use.
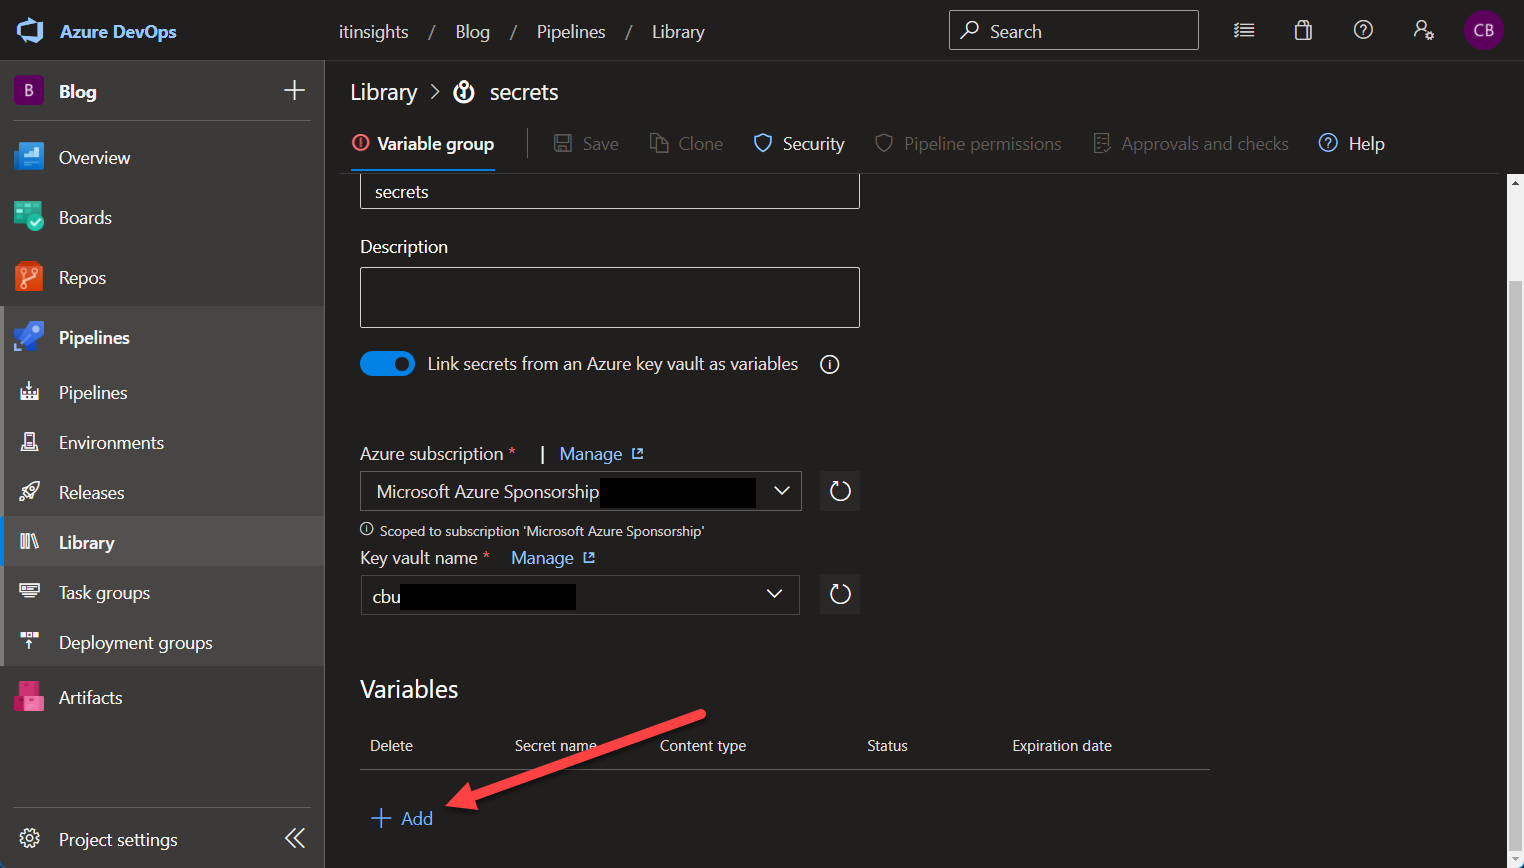 Azure Pipelines Variable Group - Key Vault
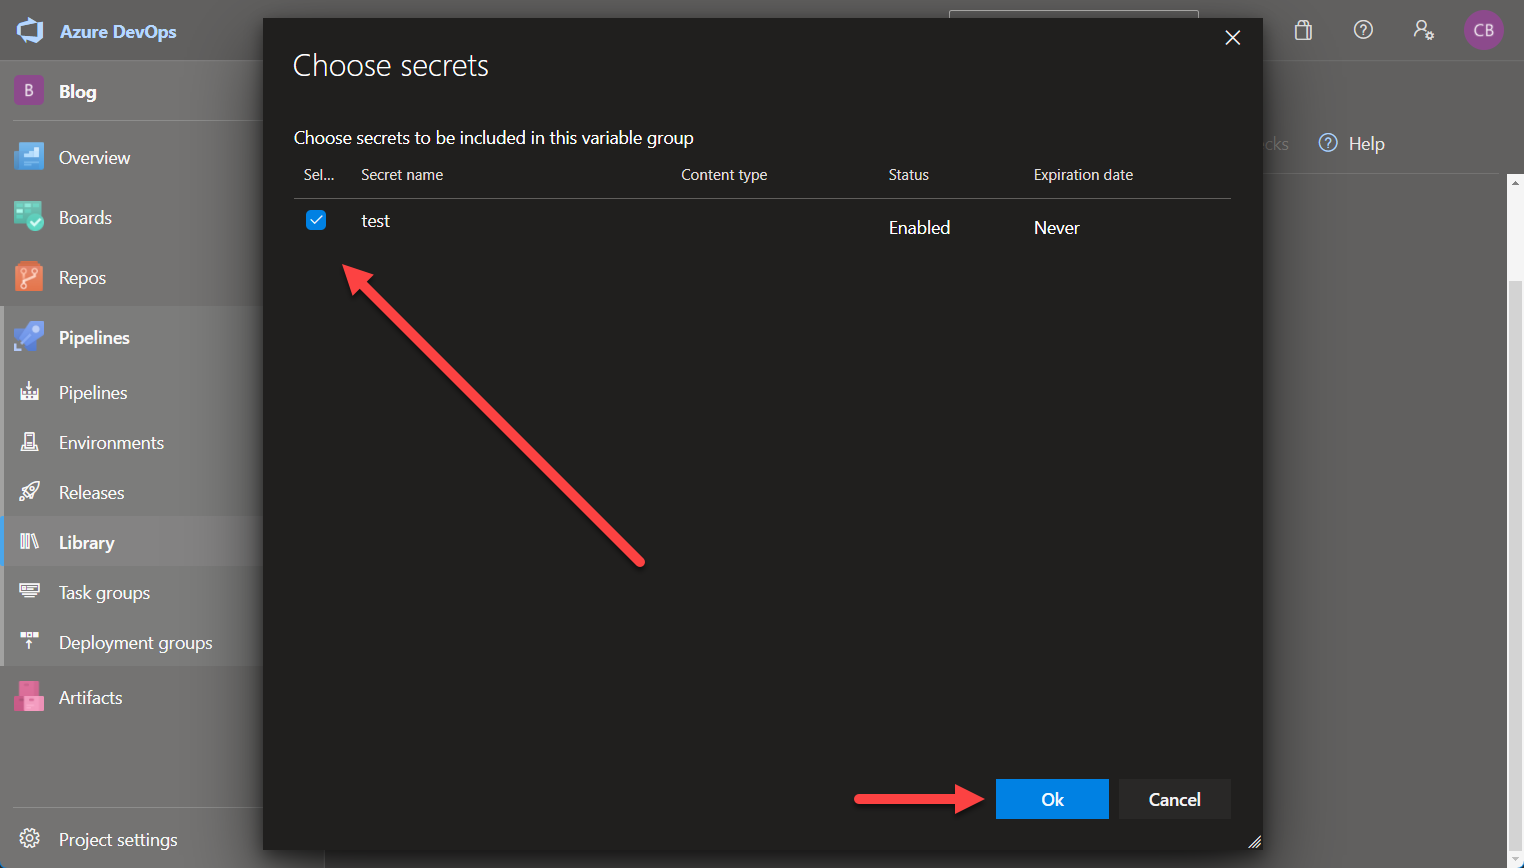 Azure Pipelines Variable Group - Key Vault
Afterwards, you can reference the secrets the same way as shown above.
Another way is to use secure files. Secure files are just regular files that will be treated as secrets. Usually, secrets are key-value pairs but there are other forms too, a certificate for instance cannot be stored as key-value pair because of its format and this is where secure files come into play.
You can upload a secret file and download it during a pipeline run to use it.
1 | ... |
You can read more about Variable Groups.
GitHub Actions
In GitHub Actions, you can use secrets as key-value pairs only. They get a name and the secret value itself. Storing and accessing them is where it gets interesting.
If your secrets have the same name at different scopes (organization, repo, environment), the lowest level takes precedence
If a secret with the same name exists at multiple levels, the secret at the lower level takes precedence. For example, if an organization-level secret has the same name as a repository-level secret, then the repository-level secret takes precedence. Similarly, if an organization, repository, and environment all have a secret with the same name, the environment-level secret takes precedence. >source
Environment > Repository > Organization
Organization Secrets
As mentioned above, if you want to use organization wide secrets within private repos, you need an enterprise license, however, it is free to use in public repos.
 GitHub Actions Secrets
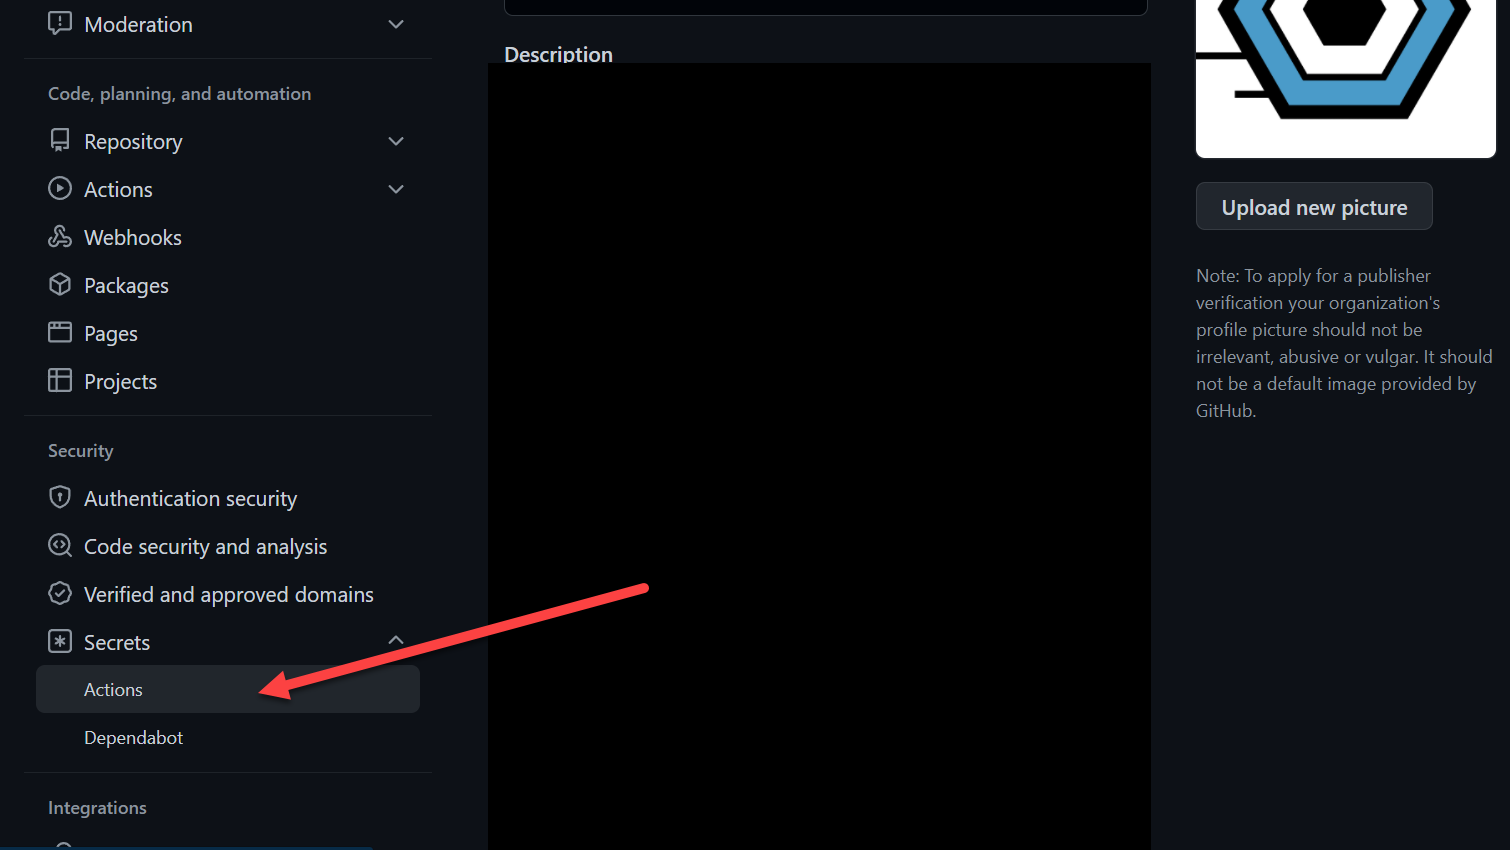 GitHub Actions Secrets
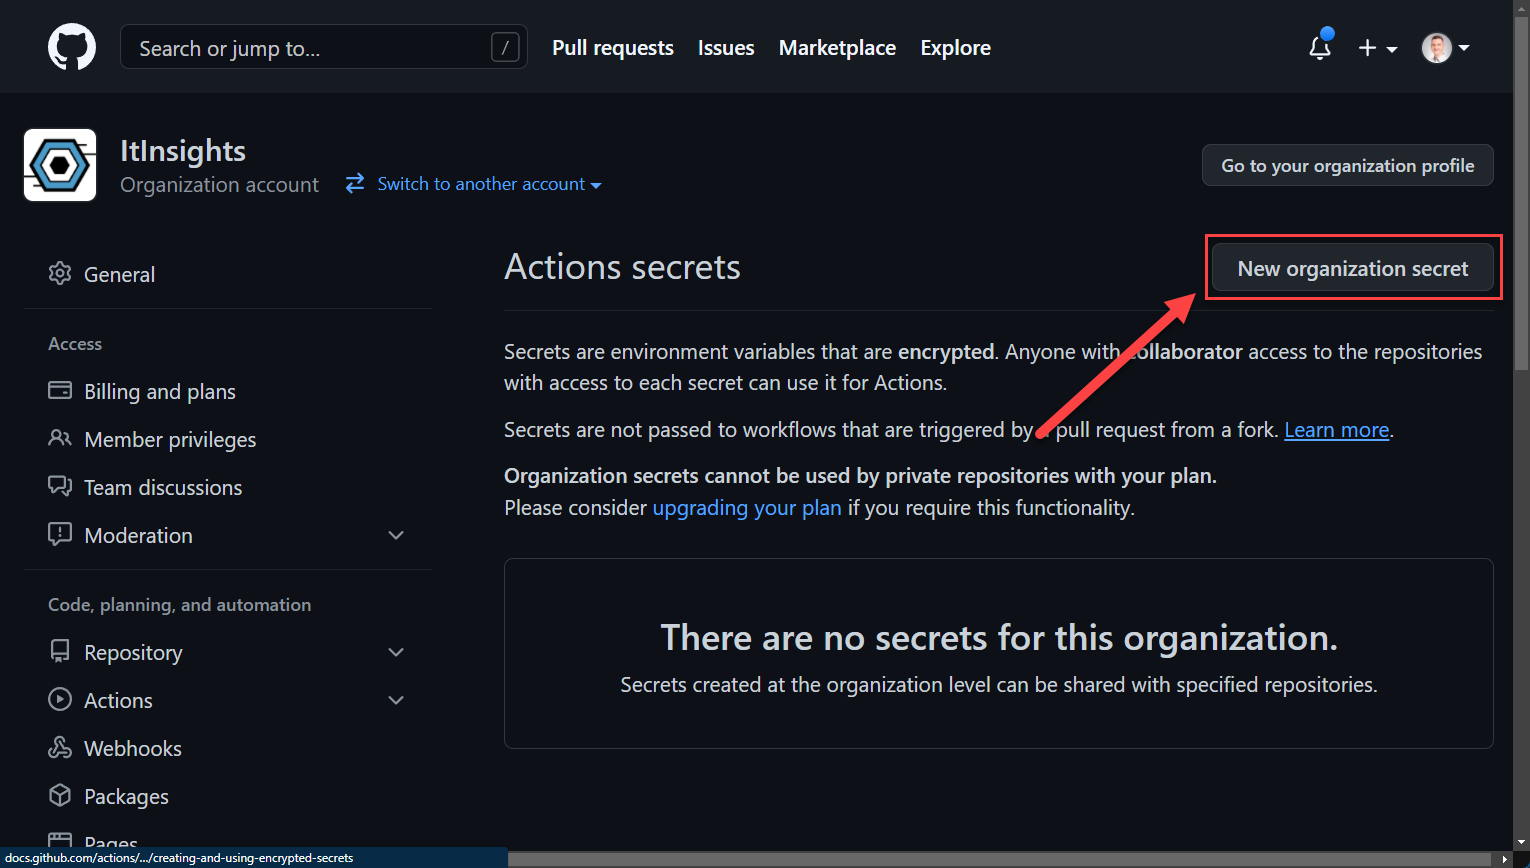 GitHub Actions Secrets
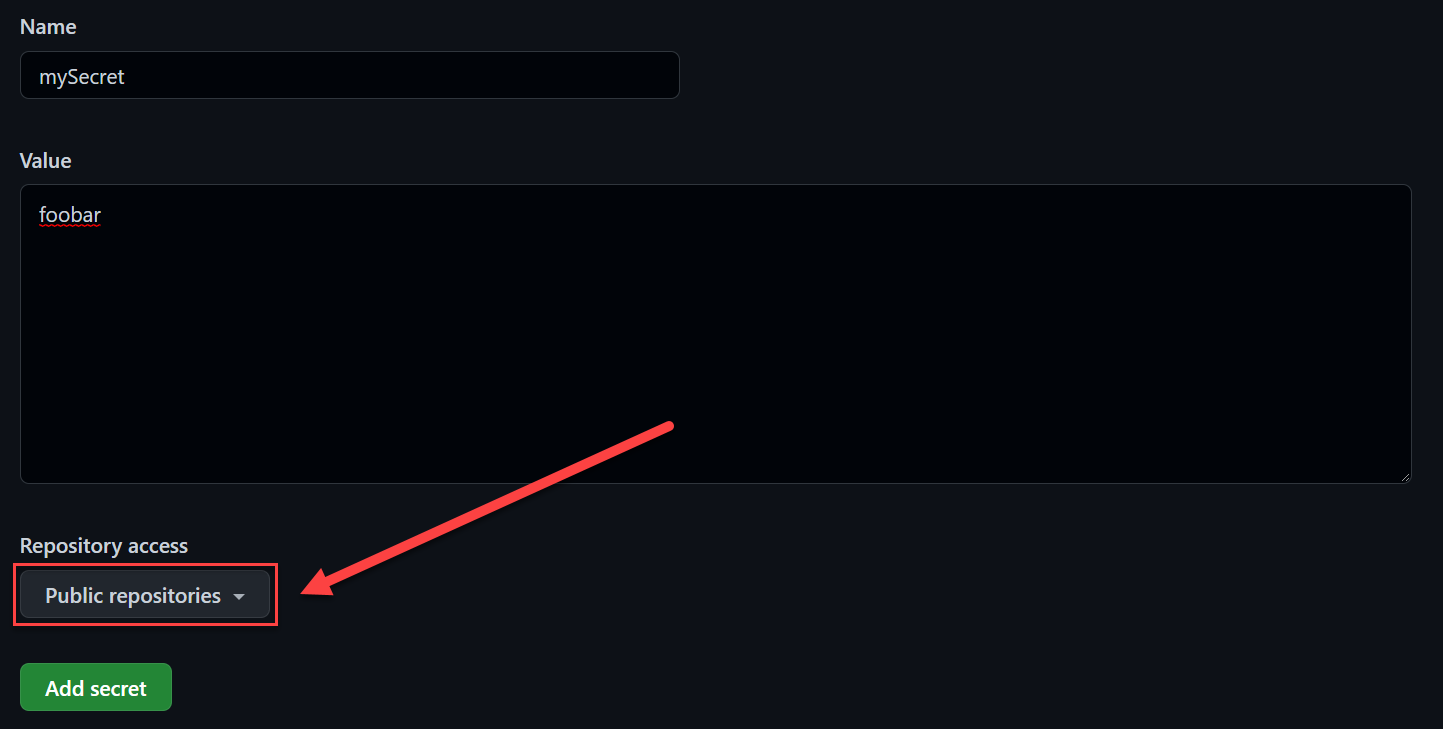 GitHub Actions Secrets
You can also select repositories, the secret can be used from, it is either all or just selected ones.
You can reference secrets as followed:
1 | ... |
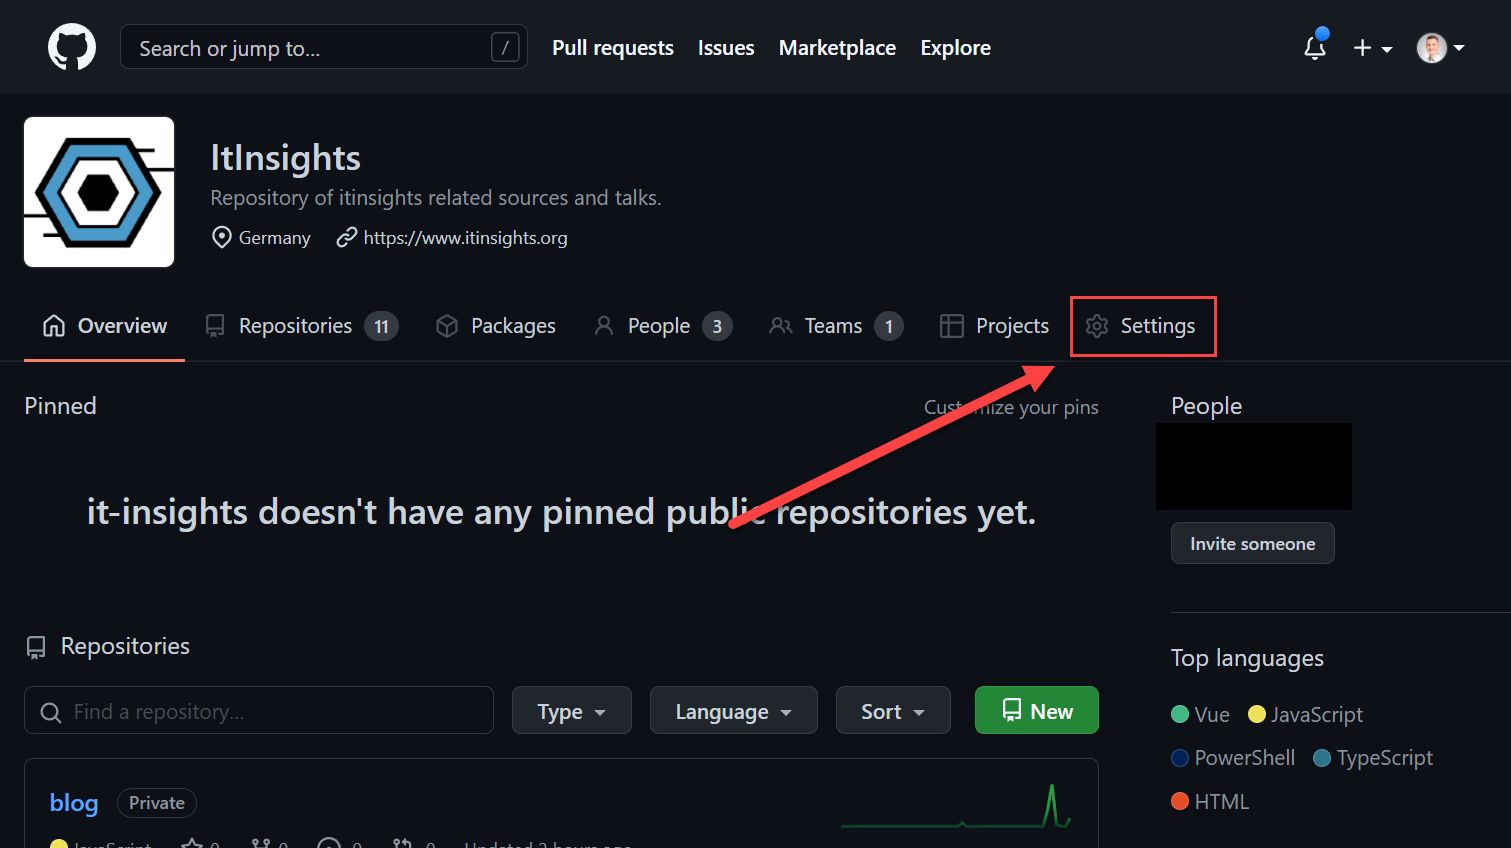
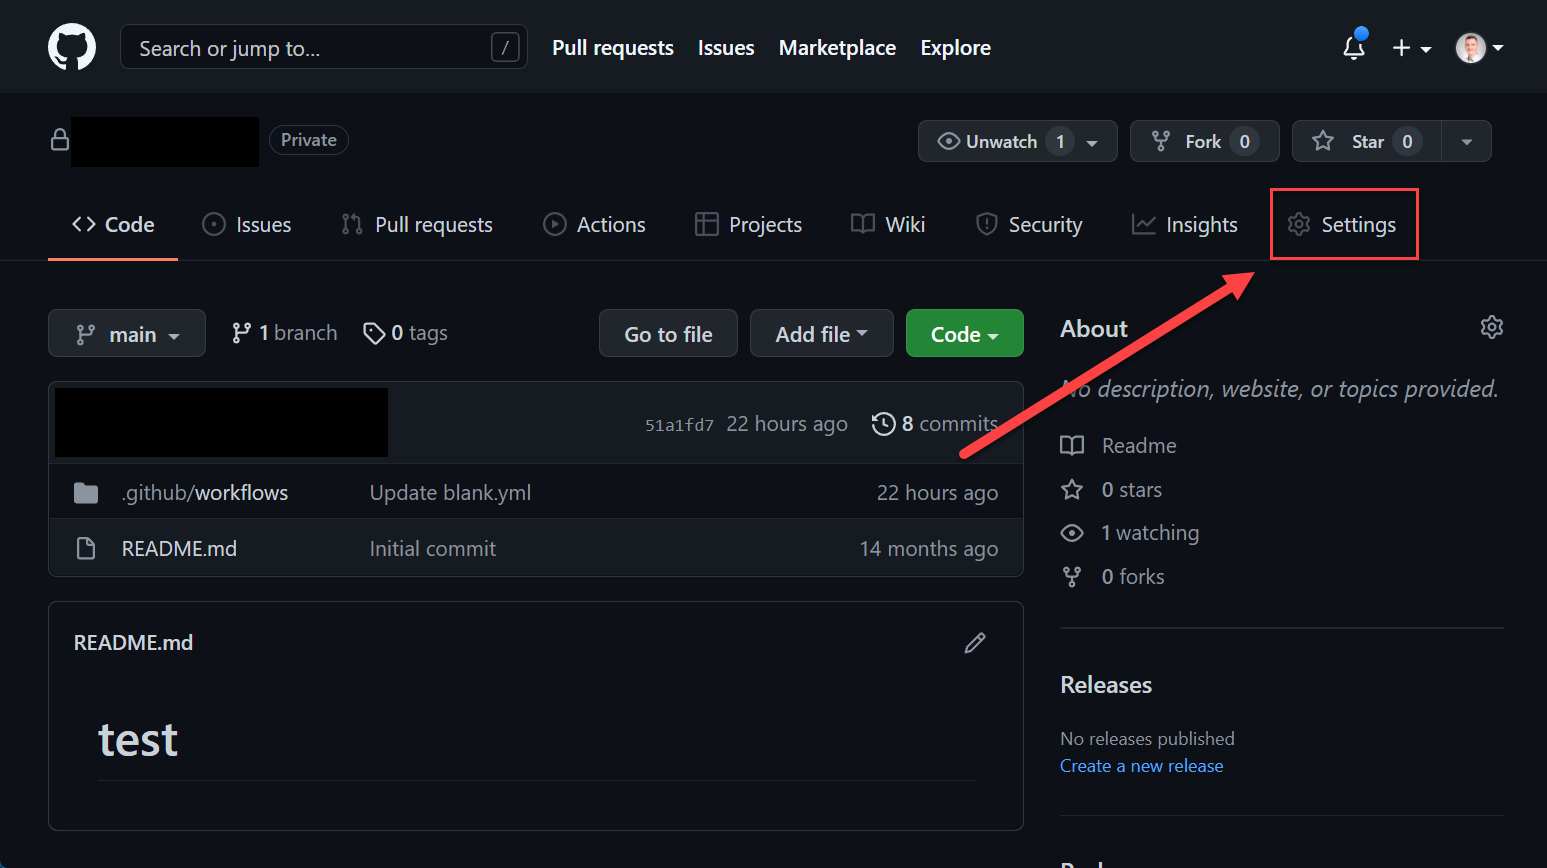
Repository Secrets
Repository secrets are declared on a repository level. Go to the Settings tab on your repository.
 GitHub Actions Secrets
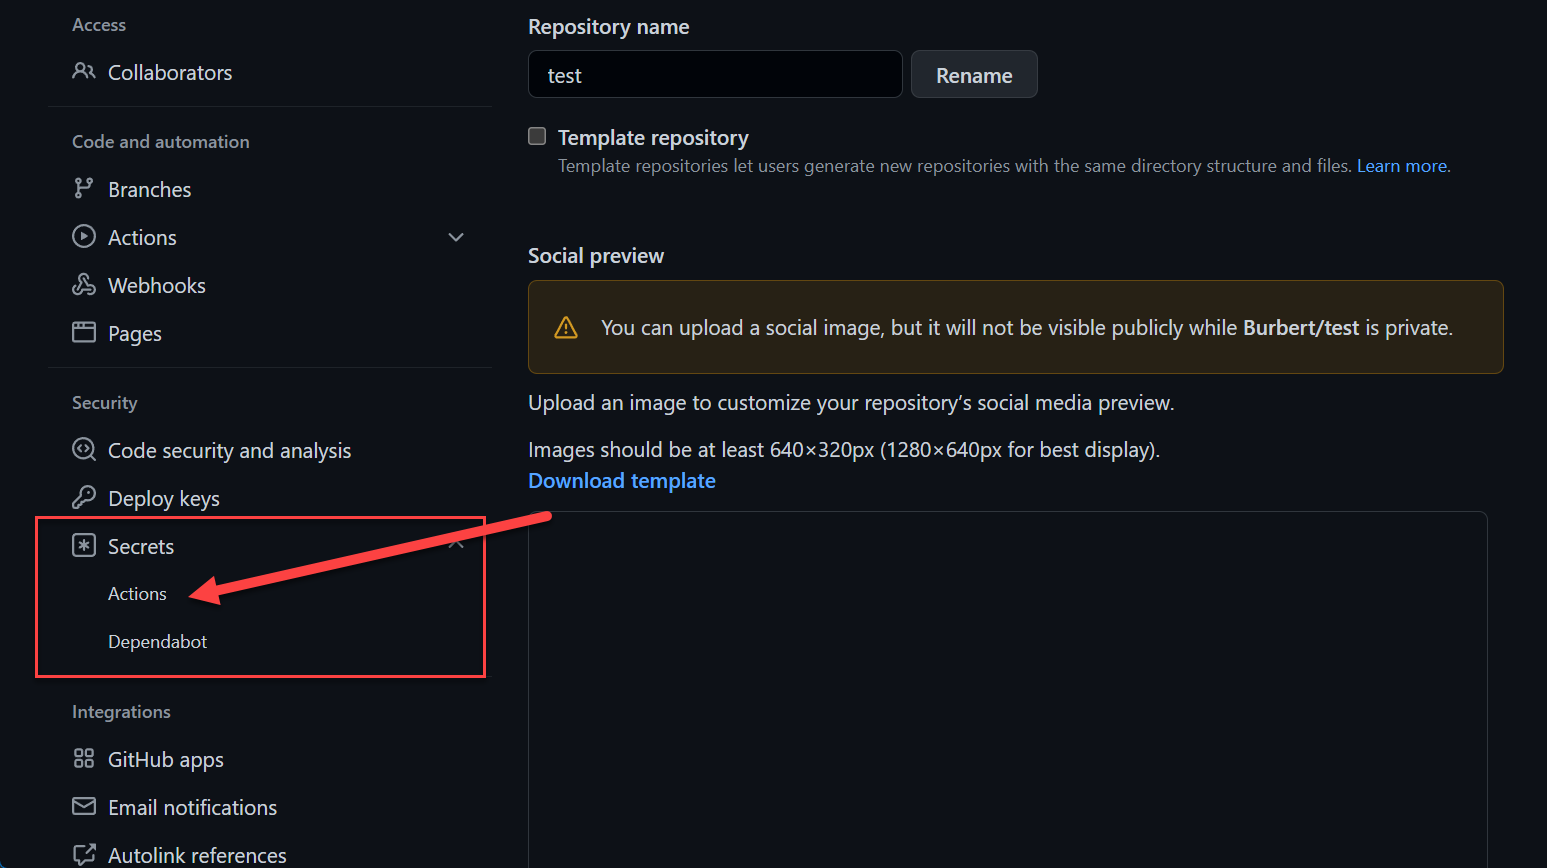 GitHub Actions Secrets
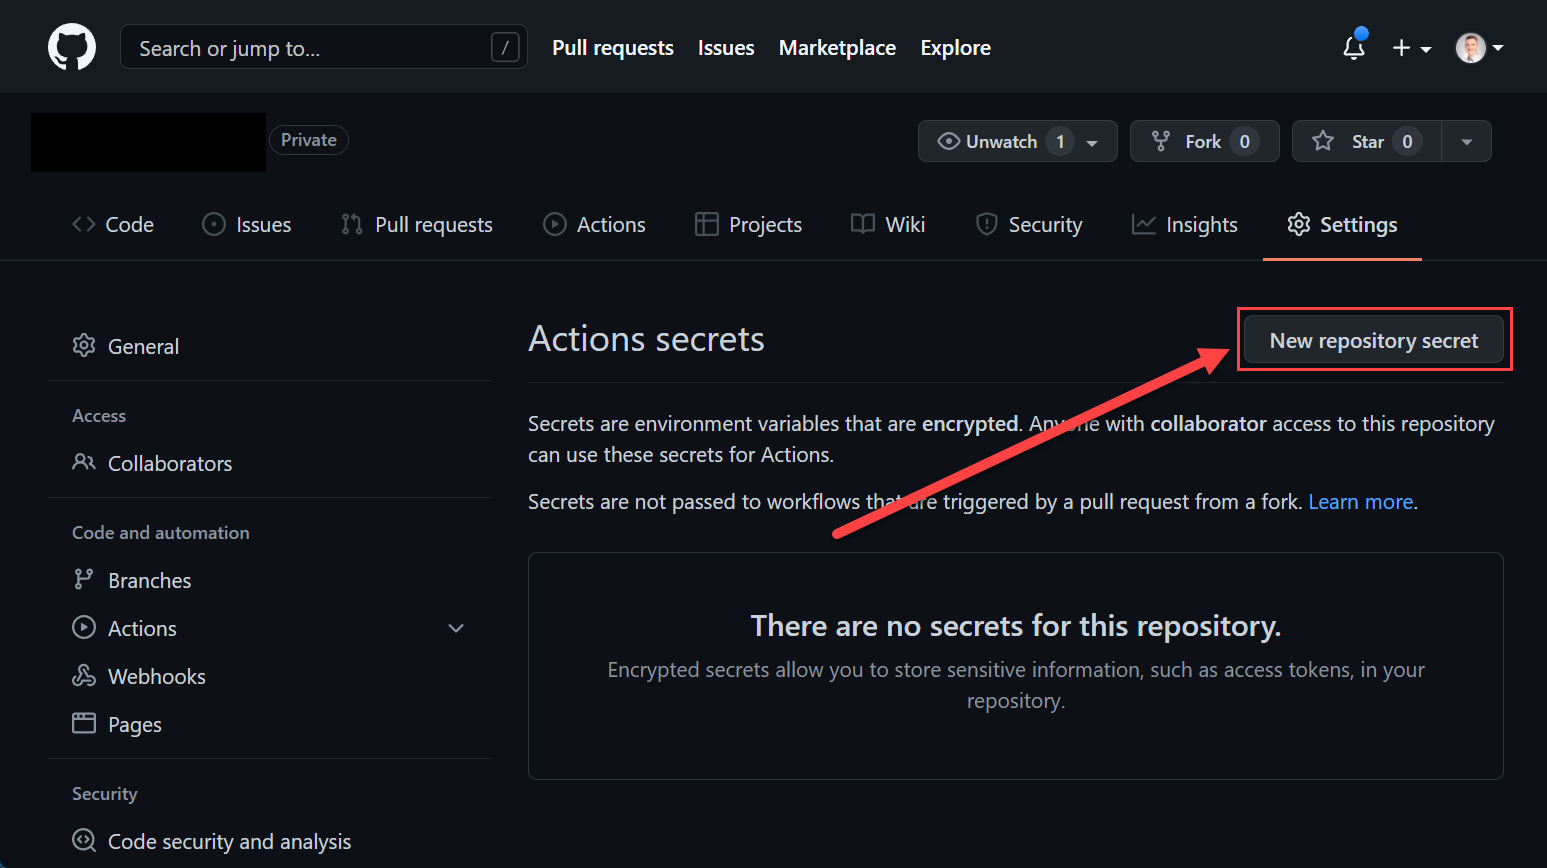 GitHub Actions Secrets
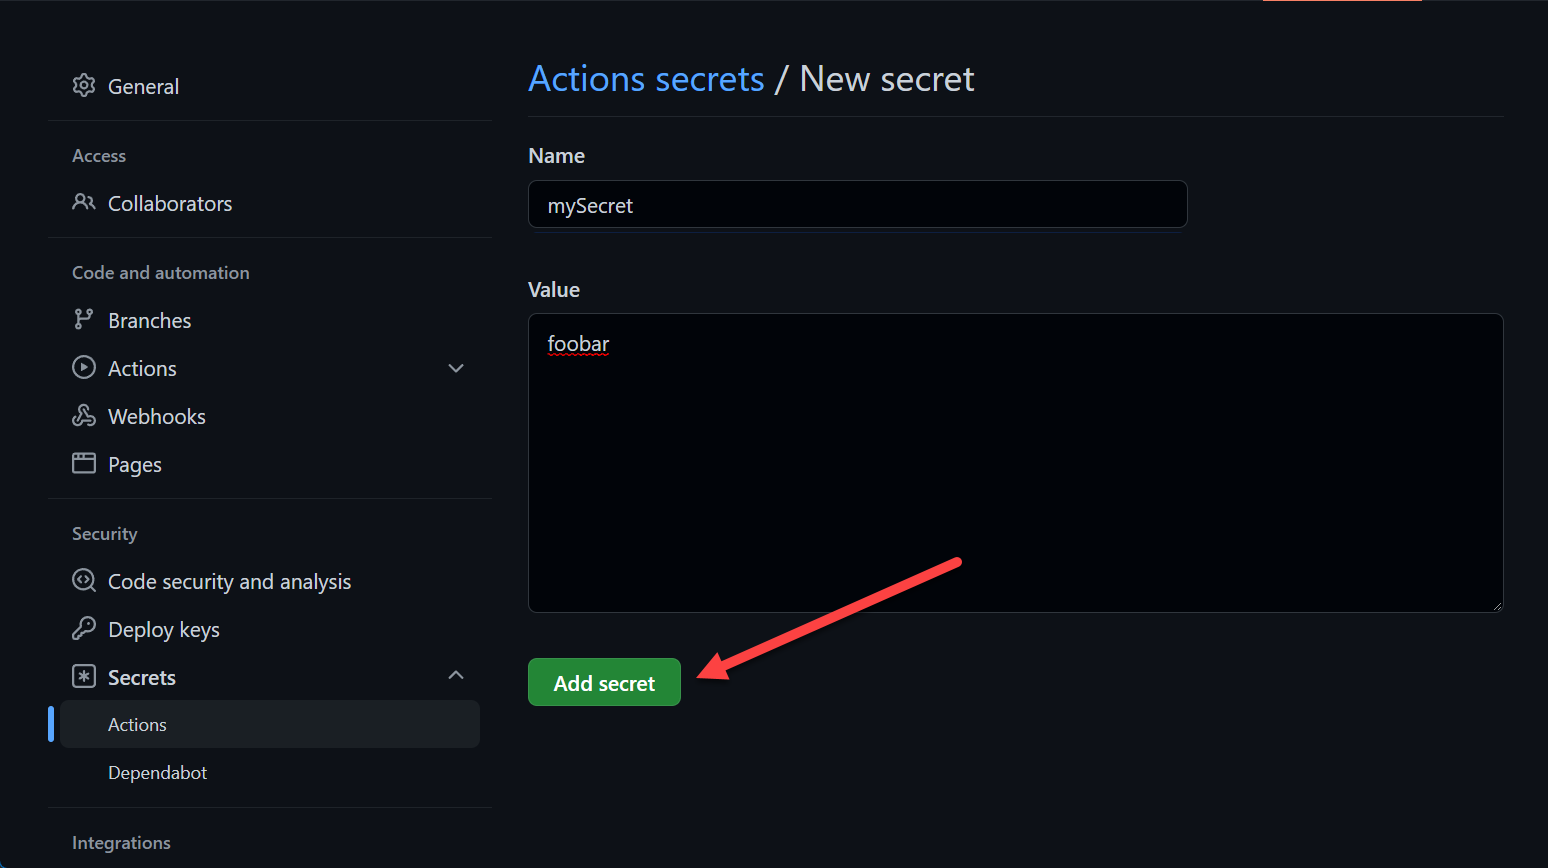 GitHub Actions Secrets
You can reference them the same way as mentioned above in the organization section
1 | ... |
Environment Secrets
To create an environment, check the Deployments / Environments section of this post.
You can mange secrets there:
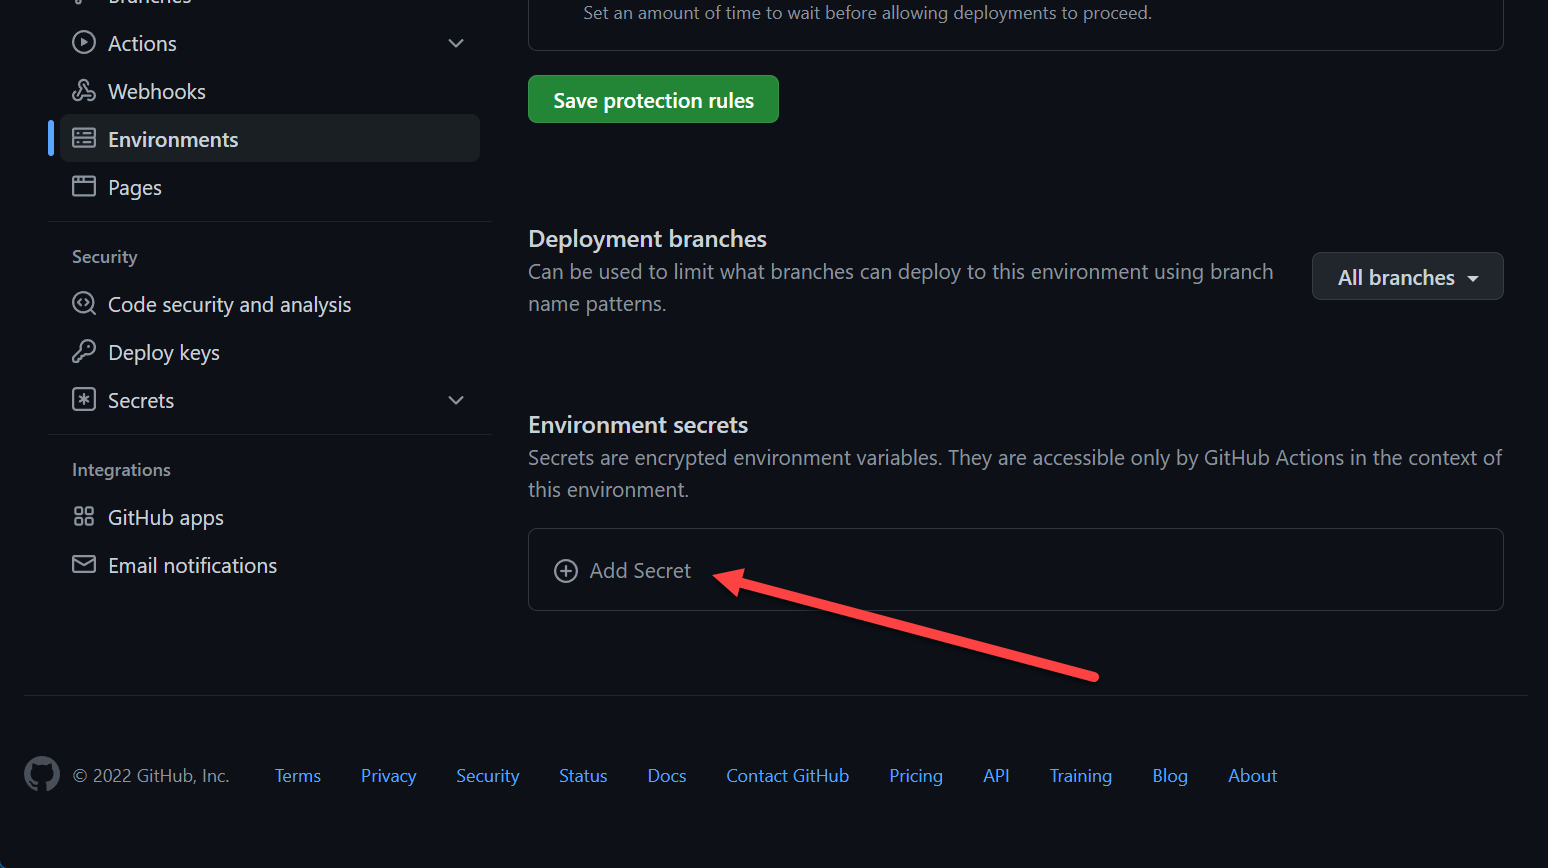 GitHub Actions Environment Secrets
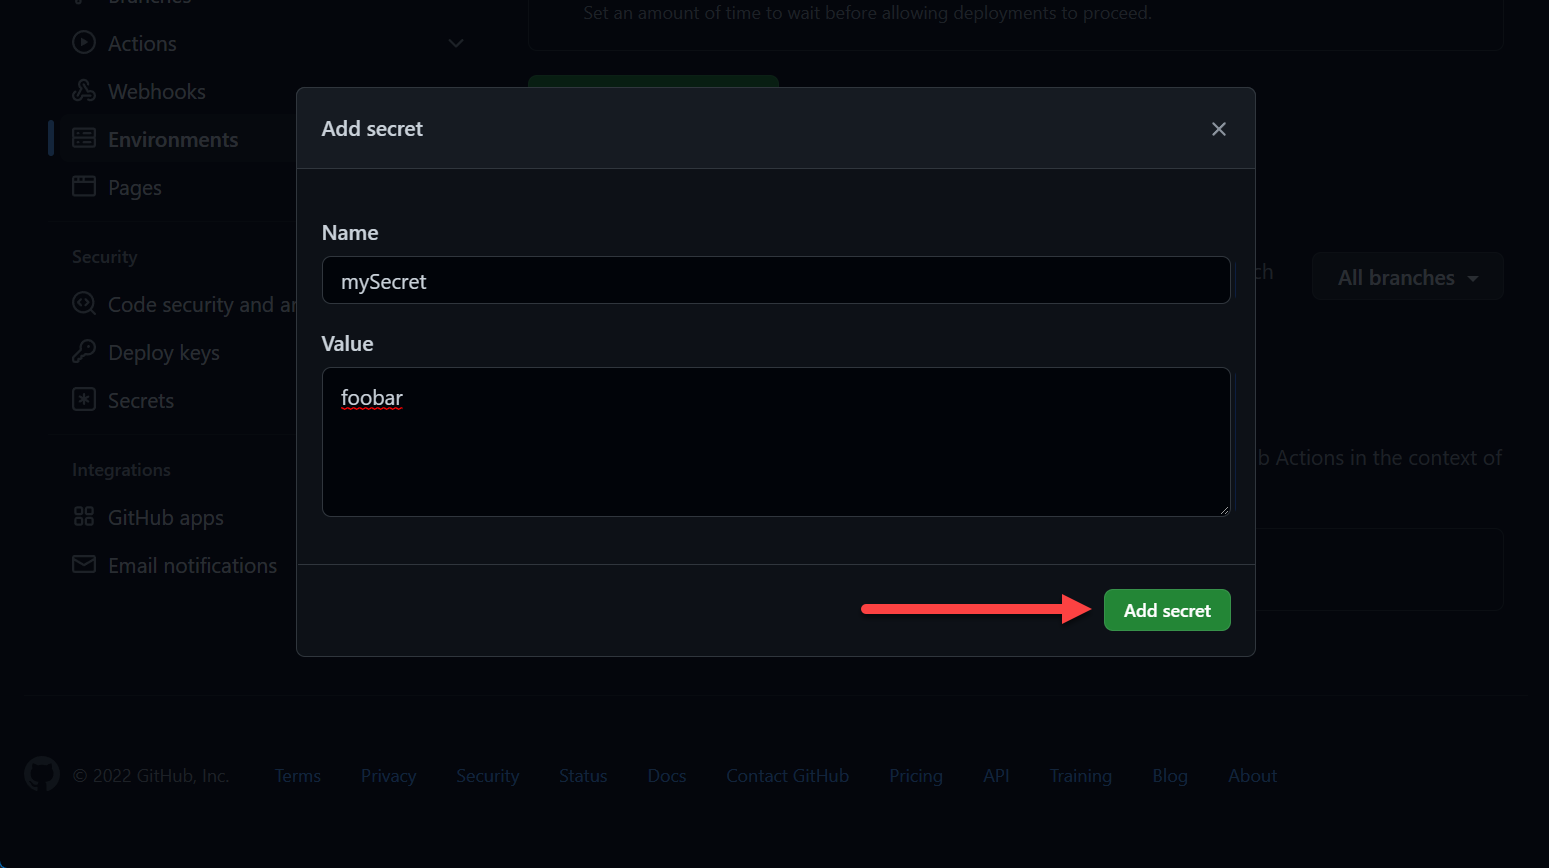 GitHub Actions Environment Secrets
You can reference them the same ways as mentioned above, however, you must reference the environment:
1 | ... |
Next
In part 4 we will check out templates, draw a conclusion and go over examples.